 AFI
AFI
Insightly
Insightly is a CRM with built-in project management, popular with mid-sized service businesses. Advanced Form Integration sends form submissions to Insightly as new contacts, leads, or organizations.
What you’ll need
- An active Insightly account.
- Your Insightly API Key (User Settings → API → API Key).
- Your Insightly API URL / pod (e.g.,
https://api.na1.insightly.com, shown next to the key). - The Advanced Form Integration plugin installed and activated.
Connect Insightly to AFI
- In WordPress, go to AFI → Settings → Insightly.
- Enter the API key and the API URL.
- Click Save Changes.
Create the integration
- Go to AFI → Add New.
- Configure the trigger.
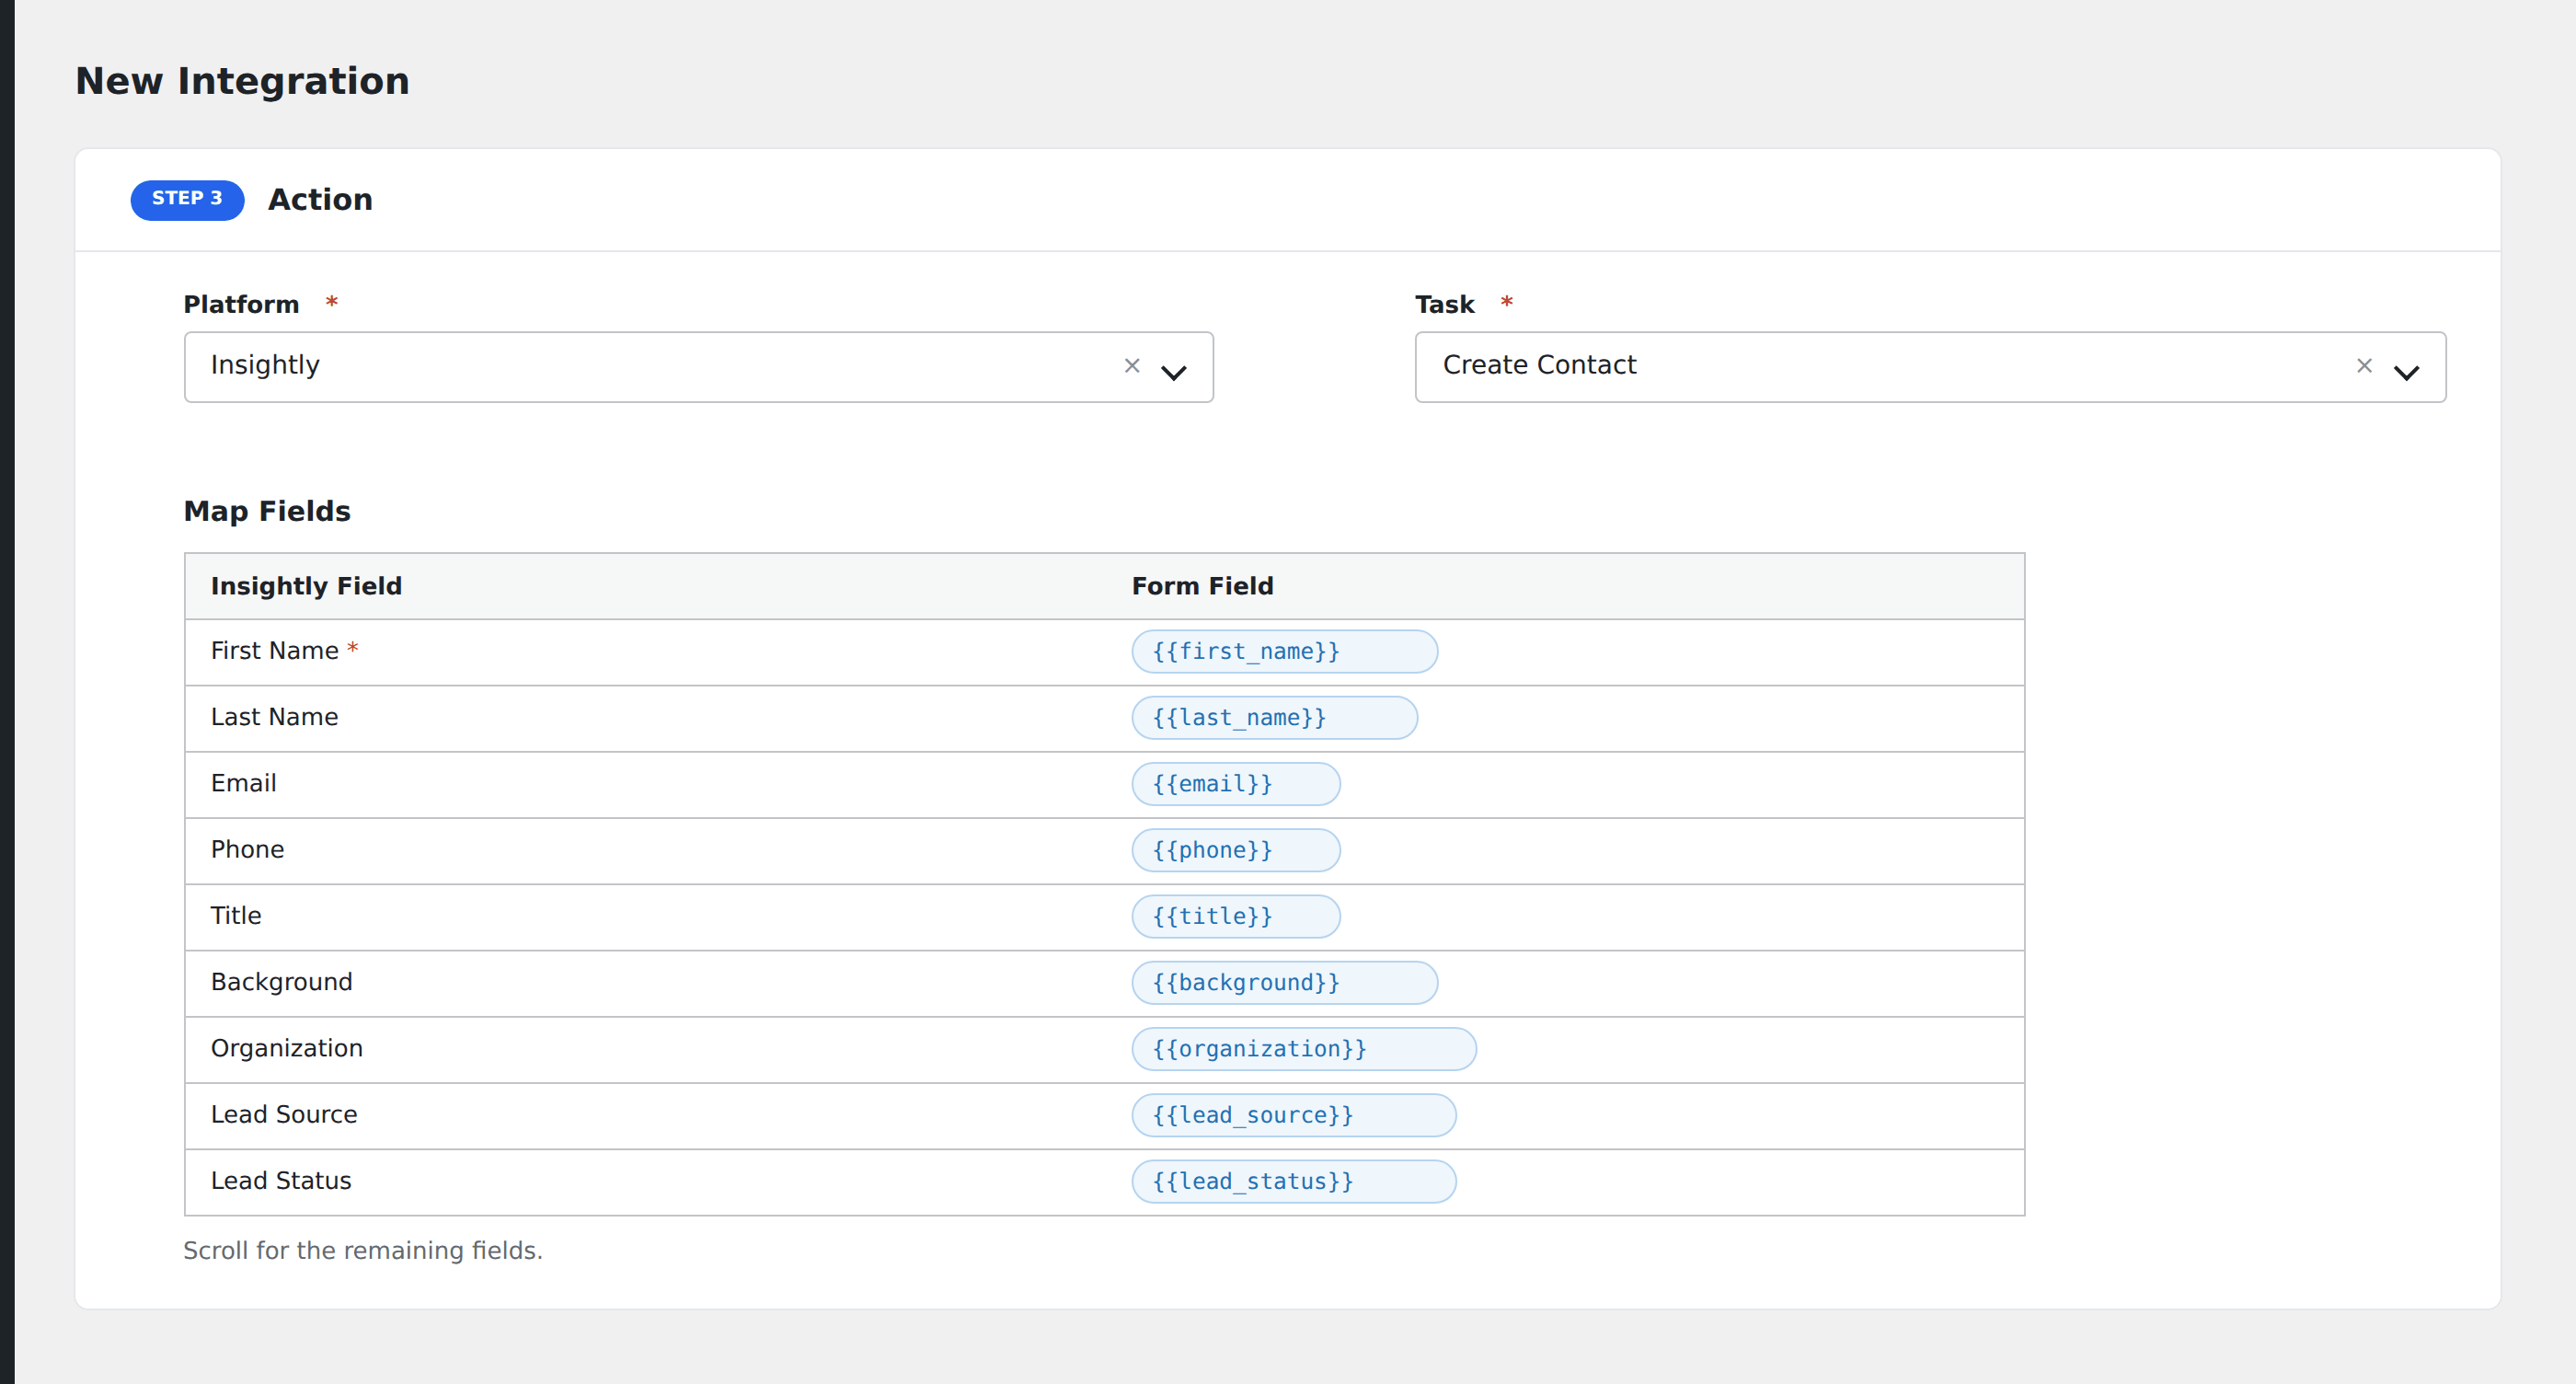
- In Action → Platform, select Insightly.
- In Task, choose Create Contact, Create Lead, or Create Organization.
- Map the form fields:
- For contact: First Name, Last Name, Email, Phone, Title, Background.
- For lead: First Name, Last Name, Email, Phone, Organization, Title, Lead Source, Lead Status.
- For organization: Organization Name, Background, Phone, Website, Address.
- Custom fields by API name.
- Optional: configure Conditional Logic.
- Click Save Integration.
Pro features
The Pro Insightly integration adds custom field mapping by friendly name, plus the ability to assign a record to a specific user (owner) on creation.
Conditional logic example
Create an Insightly lead when the form’s qualification_status field is “new”. Already-qualified leads go in as contacts instead via a second integration.
Troubleshooting
“Invalid pod”
Insightly hosts accounts on multiple pods (na1, eu1, etc.). The API URL must match your account’s pod or all calls fail with 404.