MailerLite
Overview
MailerLite is a popular email marketing platform with Groups, Subscribers, and Automation. AFI ships two MailerLite platform entries to cover both of MailerLite’s API generations:
- MailerLite: the current v2 API. Use this if your account was created in 2022 or later (or you’ve migrated to the new dashboard).
- MailerLite Classic: the legacy v1 API. Use this if your account still uses MailerLite’s classic dashboard and v1 API key.
Both entries have the same task (Subscribe To Group) and the same mapping shape; the only difference is which MailerLite API your account is on. Pick the entry matching your API key type.
Supported actions
- Subscribe To Group (Free + Pro): subscribe the form submitter to a chosen MailerLite Group, populate email / name / custom fields, and assign a subscriber status.
AFI Pro adds richer field mapping for MailerLite. More sender-plugin field types (phone, date, dropdown, hidden, custom fields) are exposed in the mapping panel, and your MailerLite custom subscriber fields surface alongside the standard ones.
Quick reference
| Need to… | Do this |
|---|---|
| Subscribe to a Group | Create integration; MailerLite (or MailerLite Classic); Subscribe To Group; pick the Group from the dropdown. |
| Send to multiple Groups | Create one integration per Group with matching Conditional Logic, or pick multiple Groups in the same integration. |
| Set subscriber status | Pick Active, Unsubscribed, or Unconfirmed (double opt-in) in the integration. |
| Capture custom fields | Custom MailerLite fields appear in the mapping panel; refresh the dropdown after adding new fields. |
| Re-pull groups / fields | Click the refresh icon next to the dropdown in AFI to re-fetch from MailerLite. |
Heads up: MailerLite v2 keys and v1 (Classic) keys are not interchangeable. If you connect to the wrong AFI platform entry you’ll get a 401 on every request. Check which API your account is on inside MailerLite (the new dashboard exposes v2 keys; the classic dashboard exposes v1 keys). The full setup walkthrough (with screenshots) is below.
Obtaining MailerLite API Key
Before start, you are required to save the API Key in plugin settings.
- Go to the [direction]WordPress admin area > AFI > Settings[/direction] menu and activate MailerLite.
- Log in to your MailerLite account.
- Go to Integrations>Developer API
- Select Use.
- Copy API Key.
- Now go to AFI > Settings >MailerLite and paste the key.
- Click Save Changes.
Create New Integration
Once API keys are saved you can start creating new integration. Click on Add New under AFI menu, New Integration page will appear.
Title
A default title will be auto-generated with an auto incremental number. You can rename it to something related to the task. It will help you to quickly recognize the correct one when there is multiple integrations setup.
Trigger
Select Correct Sender Form in Form Provider dropdown. Desired Form plugin must be installed and activated otherwise you won’t see it listed. After selecting Correct Form, all forms built under that Forms will be fetched and auto-populated in the Form/Task Name dropdown. Select the form that you want to integrate.
Action
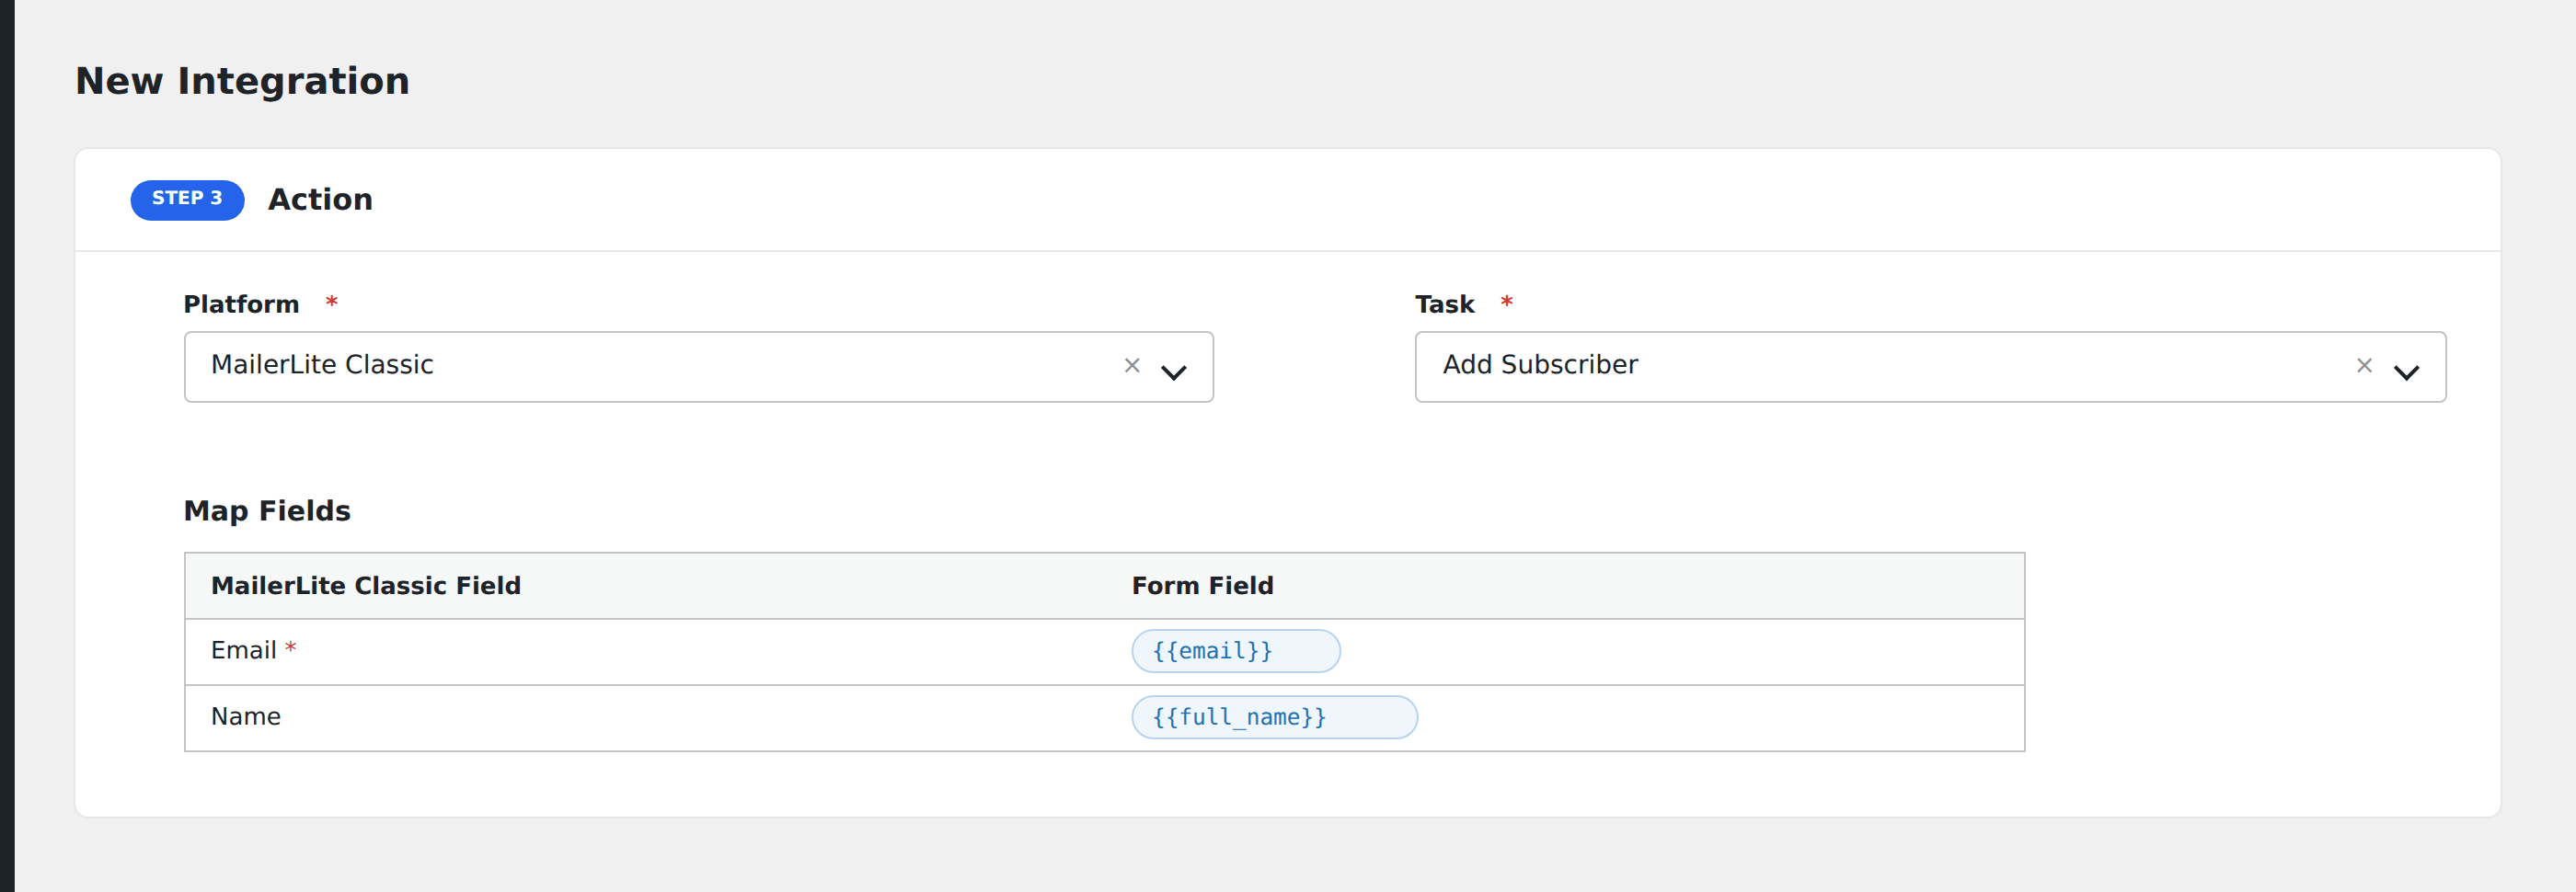
Select MailerLite in Platform dropdown. In Pro version you’ll get the option MailerLite [PRO]. Select that.


Map Fields
Map Fields section will appear where you’ll be able to determine which fields to send.Map Email, First Name, Last Name etc. fields with their similar field in sender platform. Finally, click the Save Integration button.
Troubleshooting
After the integration is made, when users fill up the form and submit it, the plugin initiates the process of sending data to the configured platform. It also saves a log that includes what data it tried to send, and what it got in response from that platform. So if you find an integration is not working, your first task is to check the logs. Go to AFI > Log menu and check the recent logs.

Common issues & fixes
Most MailerLite issues are picking the wrong platform entry, or wrong key. Work through these in order:
- Pick the platform entry matching your API key generation. Use MailerLite (no suffix) for v2 keys generated in the new dashboard; use MailerLite Classic for v1 keys on the classic dashboard.
- Generate a fresh API key. In MailerLite; Integrations; Developer API; generate a key with the relevant scopes (subscribers + groups).
- Refresh groups / fields dropdowns. Click the refresh icon next to each dropdown after creating new Groups or custom fields in MailerLite.
- Pick the right subscriber status. Active sends marketing emails immediately; Unconfirmed triggers the double-opt-in confirmation email; Unsubscribed effectively bench-sits the contact.
Specific symptoms
- 401 Unauthorized. Wrong API key type (v1 vs v2) or revoked key; regenerate in MailerLite and paste it again into the matching AFI platform entry.
- Group not in dropdown. Click refresh next to the Group dropdown; if still missing, confirm the Group exists in MailerLite under the same account the API key belongs to.
- Custom fields not appearing. Pro is required for full custom-field mapping; click refresh in the field dropdown after adding new fields in MailerLite.
- Subscriber created but no double-opt-in email. Set status to Unconfirmed (or enable double opt-in at the Group level in MailerLite).
Notes & caveats
- Two AFI entries, same task shape. Mapping fields, dropdown structure, and conditional-logic rules are identical between MailerLite (v2) and MailerLite Classic (v1); only the API endpoint and key generation differ.
- API rate limits. MailerLite caps API calls per minute per account; enable AFI’s Job Queue (Settings > General) for high-volume forms.
- Group vs Segment. AFI subscribes to a Group (static list). Segments are dynamic queries in MailerLite and update automatically based on subscriber attributes; you don’t need to (and can’t) write to them directly via AFI.