 AFI
AFI
Google Calendar
Google Calendar is the world’s most-used scheduling app. Advanced Form Integration creates a new Google Calendar event for every form submission, mapping form fields to event title, start/end time, attendees, and description. Especially useful with booking-form senders (Bookly, Amelia, Easy Appointments, WooCommerce Bookings) to keep your team’s calendar in sync.
What you’ll need
- A Google account with access to the calendar(s) you want to write to.
- A Google Cloud project with the Calendar API enabled and an OAuth client.
- The Advanced Form Integration plugin installed and activated.
Set up the Google Cloud project
Like the Google Sheets integration, Google Calendar requires you to create your own OAuth credentials in Google Cloud. Google requires this for any third-party app accessing user data.
- Go to the Google Cloud Console and create a new project (or pick an existing one).
- Open APIs & Services → Library.
- Search for Google Calendar API and click Enable.
- Open APIs & Services → OAuth consent screen.
- Set up the consent screen as External (for personal Google accounts) or Internal (for Google Workspace).
- Add the scope
https://www.googleapis.com/auth/calendarfor full read/write, orcalendar.eventsfor events-only. - Open APIs & Services → Credentials and click Create Credentials → OAuth client ID.
- Choose Web application as the application type.
- Under Authorized redirect URIs, paste the URI shown in AFI → Settings → Google Calendar.
- Click Create and copy the Client ID and Client Secret.
If your OAuth consent screen is in Testing mode, only test users you explicitly add can authorize the app. Publish the app (no Google verification required for personal use) to allow any user to authorize.
Connect Google Calendar to AFI
- In WordPress, go to AFI → Settings → Google Calendar.
- Click Add Account and paste the Client ID + Client Secret.
- Click Save & Authorize.
- Google’s auth screen opens. Sign in and grant calendar access.
- AFI returns to the settings page showing Connected.
Create the integration
- Go to AFI → Add New.
- Configure the trigger.
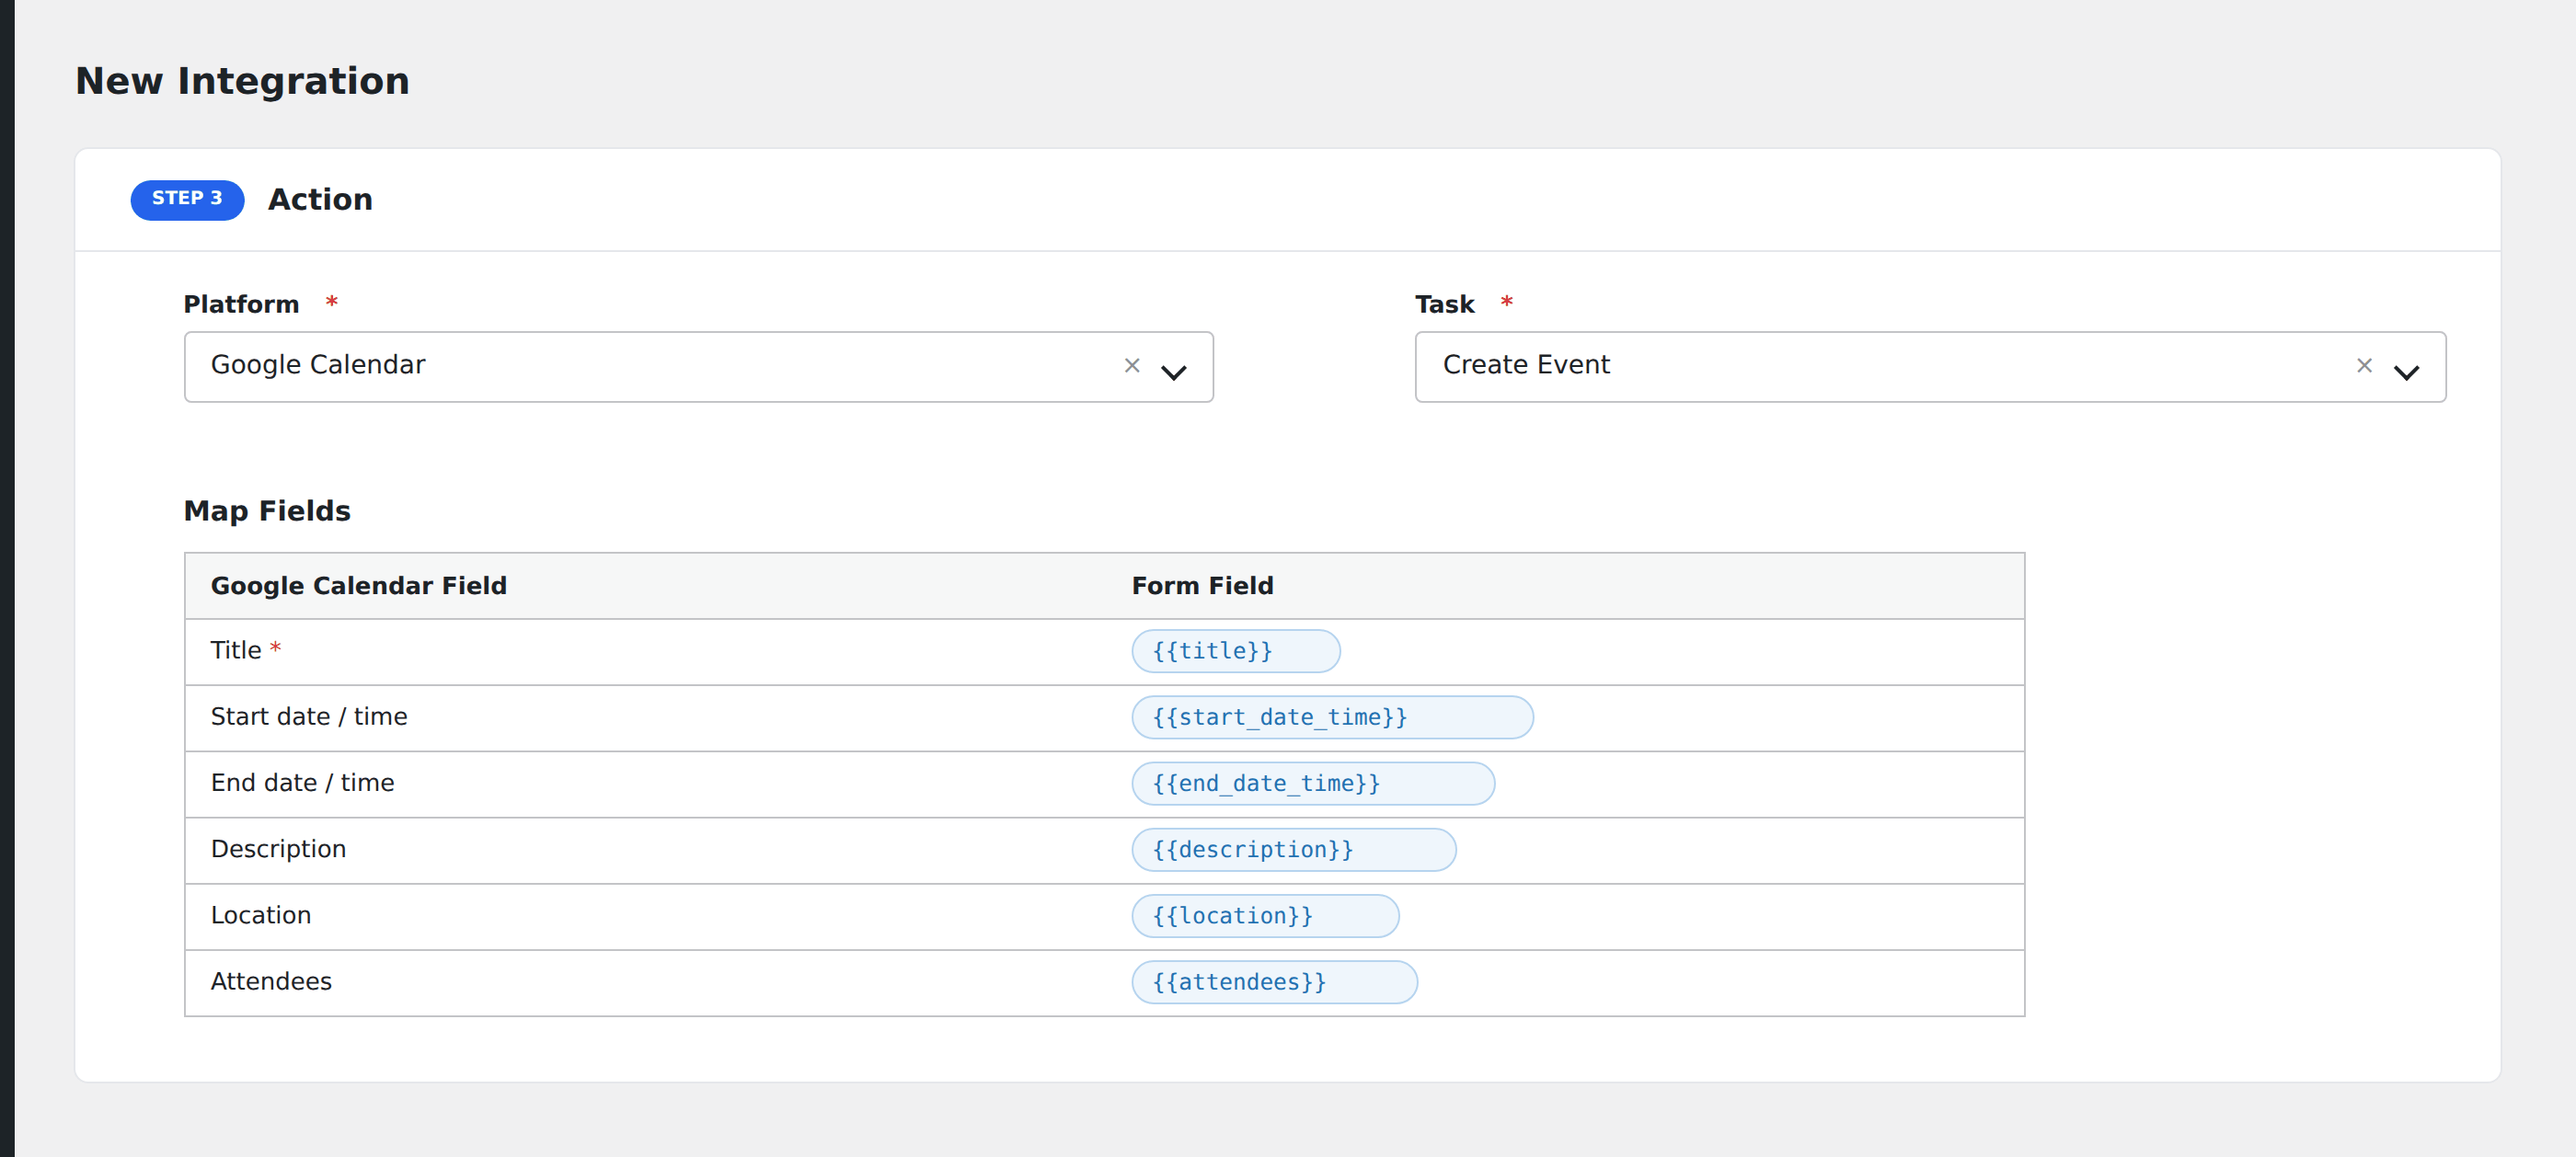
- In Action → Platform, select Google Calendar.
- In Task, choose Create Event.
- The Calendar dropdown auto-populates with calendars on your authorized account. Pick one.
- Map the form fields to event fields:
- Title (required): the event name.
- Start date / time (required):
YYYY-MM-DDandHH:MMformats. - End date / time (required).
- Description: event body, supports plain text.
- Location: venue or meeting URL.
- Attendees: comma-separated email addresses.
- Optional: configure Conditional Logic.
- Click Save Integration.
Tasks supported
Create Event
Adds a new event to the selected calendar. Attendees automatically receive Google Calendar invites if you’ve ticked “Send invitations” in the integration settings.
Conditional logic example
Goal: when a booking form’s service is Premium Consultation, also invite a senior consultant via the attendees field.
Create the Google Calendar integration. Map the standard fields. In the Attendees field, use a Mixed Field with {customer_email},se****@*********ny.com. Open the Conditional Logic panel and gate it on the service field if you only want this for premium bookings.
Troubleshooting
“Invalid request” / event not created
Open AFI → Log for the most recent entry. Common causes:
- Date/time format mismatch. Google Calendar expects ISO format. Booking-form date fields usually format correctly; manually-entered dates may not.
- End time is before start time. Check the form’s date logic.
- Calendar ID stale. Re-pick the calendar in the integration to refresh.
Invites not sent
The “Send invitations” option must be enabled in the integration. Even with it enabled, attendees receive invites only if their email addresses are valid and Google’s anti-spam doesn’t quarantine them.
Empty calendar dropdown
Authorization granted only calendar.events scope, not full calendar scope. Re-create the OAuth client with the calendar scope and re-authorize.