 AFI
AFI
Gist
Gist is an all-in-one customer-engagement platform combining email marketing, live chat, knowledge base, and meeting scheduling. Advanced Form Integration sends form submissions to Gist as new contacts.
What you’ll need
- An active Gist account.
- A Gist API Key (Settings → API Keys).
- The Advanced Form Integration plugin installed and activated.
Get your Gist API key
- Log in to your Gist account.
- Navigate to Settings → API Keys.
- Generate or copy your existing API key.
Connect Gist to AFI
- In WordPress, go to AFI → Settings.
- Enable Gist and click Save Changes.
- Open the Gist tab.
- Paste the API Key and click Save Changes.
Create the integration
- Go to AFI → Add New.
- Configure the trigger.
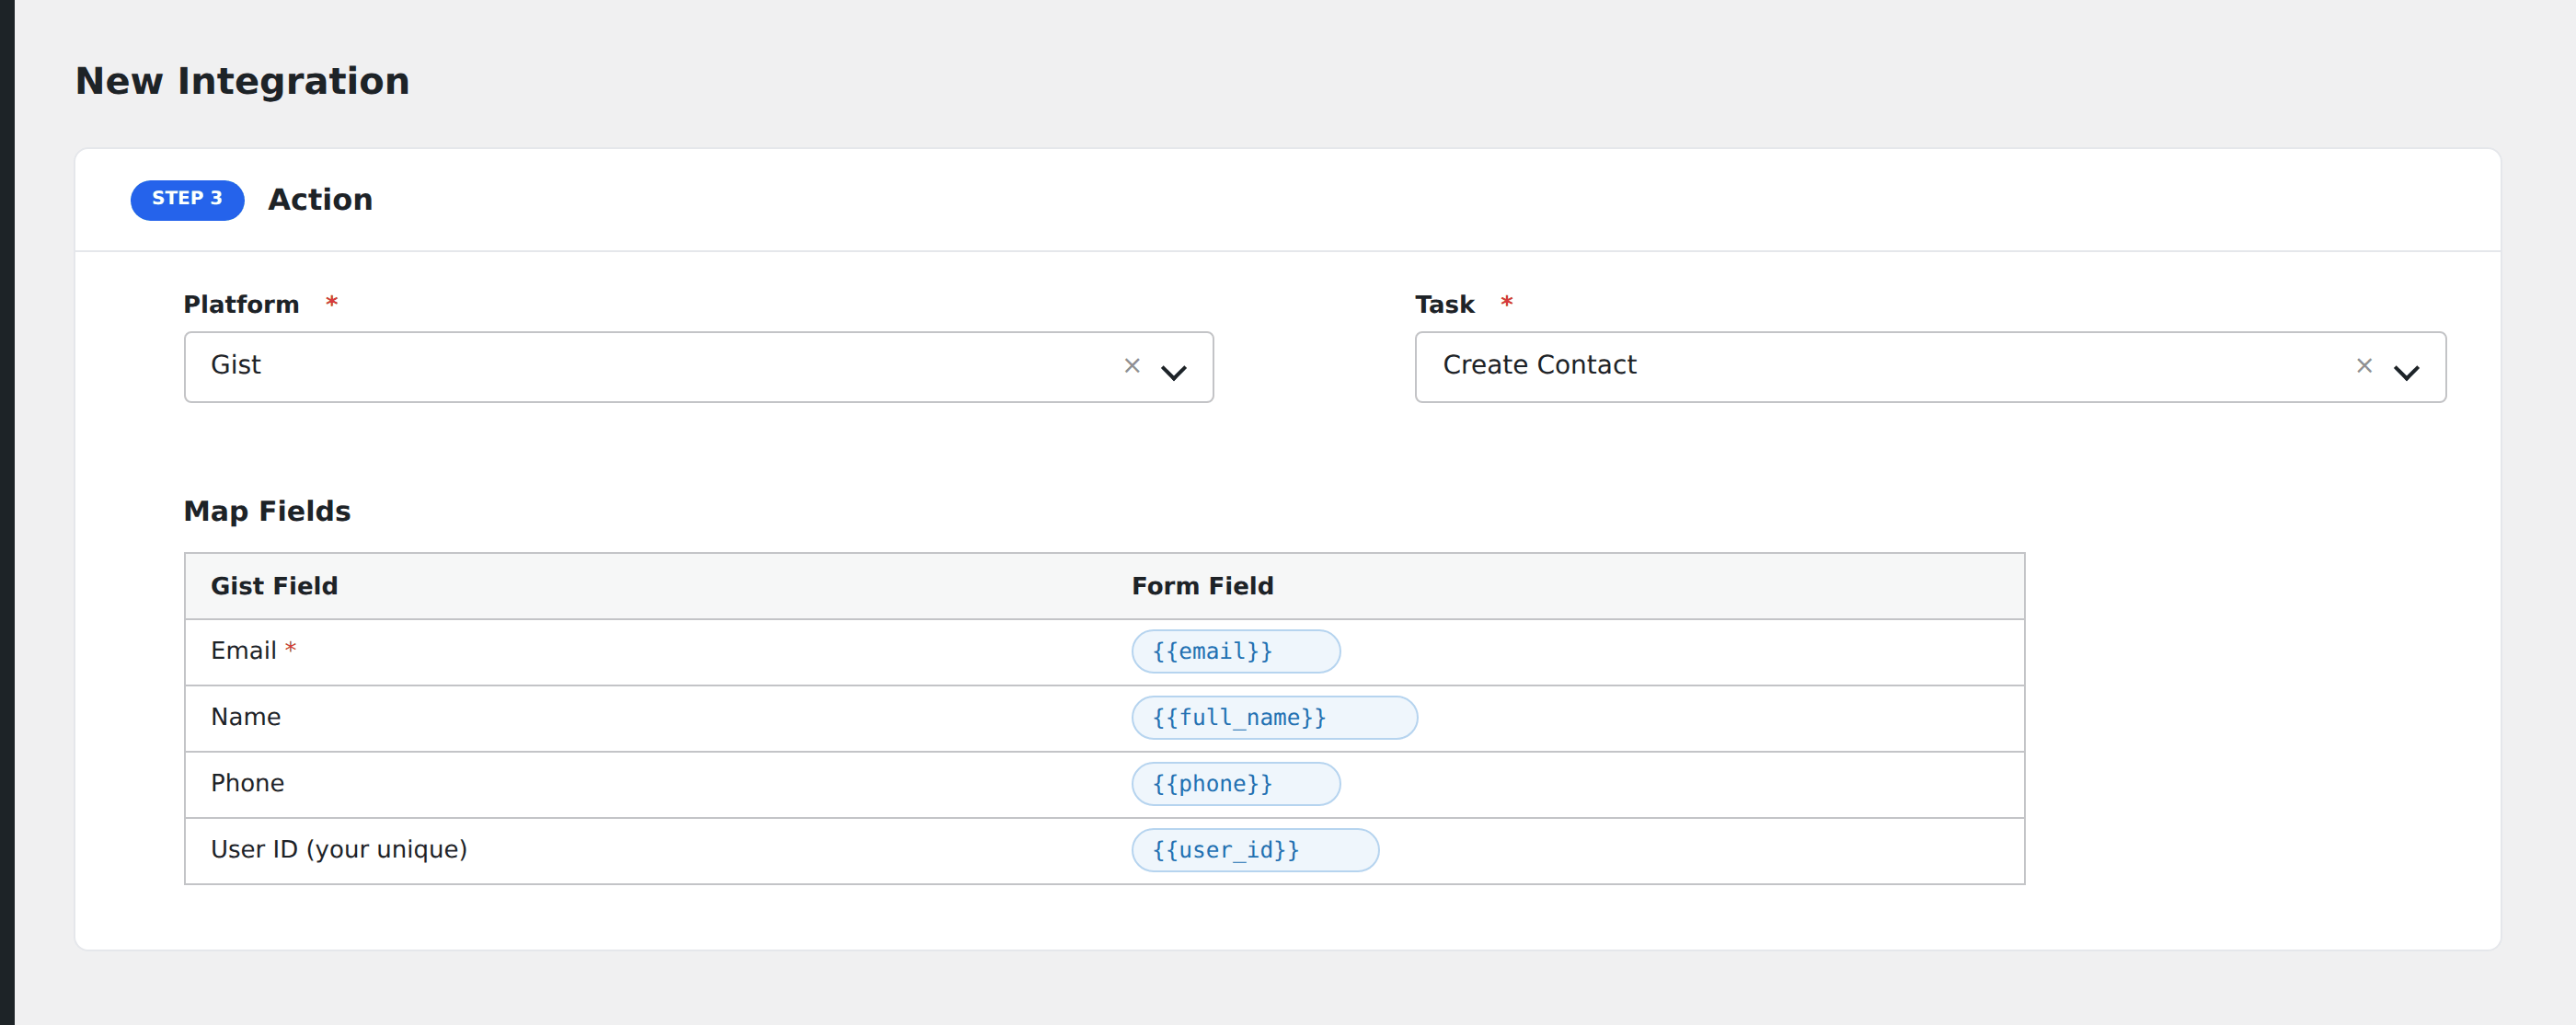
- In Action → Platform, select Gist.
- In Task, choose Create Contact.
- Map the form fields:
- Email (required), Full Name, First Name, Last Name.
- Phone Number, Company Name, Job Title.
- Location sub-fields (city, country, time zone).
- Custom contact attributes by name.
- Optional: configure Conditional Logic.
- Click Save Integration.
Tasks supported
Create Contact
Creates a new contact in Gist. If the email already exists, Gist updates the existing contact rather than creating a duplicate.
Conditional logic example
Tag the new Gist contact with a specific job title only when the form’s role field is “Decision Maker”. Other roles still get added but skip the tag.
Troubleshooting
Integration doesn’t fire
Open AFI → Log and find the most recent entry. The log shows the request payload sent to Gist and the response received, usually pointing straight at the cause.
“Authentication failed”
Gist API keys can be revoked from your account’s API Keys page. If integrations stop firing with 401, regenerate the key and re-save in AFI.