Overview
The AFI plugin connects popular WordPress forms and other plugins with Agile CRM. When someone fills out a form on your website or an event happens in a plugin, it sends the information to your Agile CRM account, creating or updating a Contact, Deal, or Note.
What You Can Do
- Create a new contact, deal, or note with primary fields. It also allows the subscriber to be added to a preferred list
- Add tags Pro
- Add custom fields Pro
How To Setup
Authentication
Before getting started, you need to connect your Agile CRM account in the plugin settings.
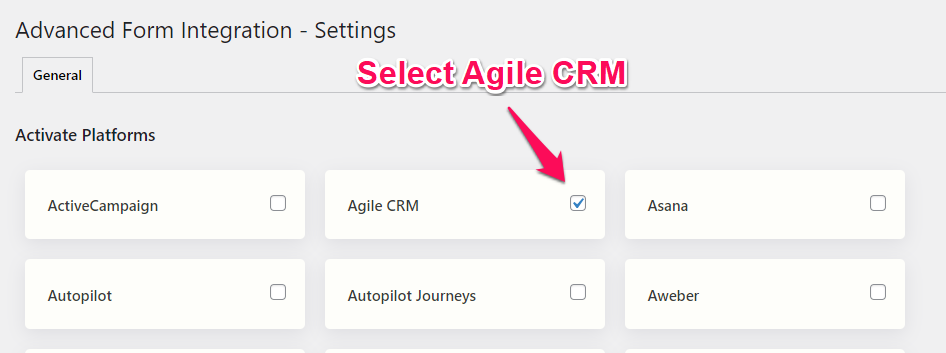
Go to AFI > Settings > General, where you’ll see a list of supported platforms. Toggle Agile CRM and click the Save Changes button at the bottom.
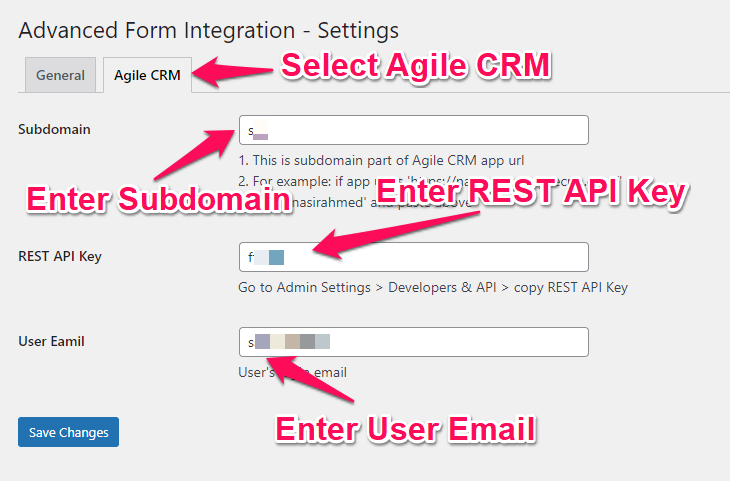
Next, click on the Agile CRM tab at the top of the settings page. Here, enter your Subdomain, REST API Key, and User Email in the respective fields, then click the Save Changes button. Instructions on how to find the API keys are provided on the Agile CRM settings page.
Create New Integration
Once the authentication is complete, you can start setting up a new integration. Click on Add New under the AFI menu, and the New Integration page will open.
Title
A default title will be automatically generated. You can rename it to something related to the task to make it easier to identify if you have multiple integrations.
Trigger
Choose the sender platform from the Form Provider dropdown, such as Contact Form 7, Gravity Forms, or Elementor Pro Form, depending on what you want to connect. Once you select the provider, all the forms created under it will automatically appear in the Form/Task Name dropdown. Select the specific form you want to integrate.
Action
In the Platform dropdown, select Agile CRM. If you’re using AFI Pro, you’ll see another option, Agile CRM [PRO]—select that instead. Then, choose Create Contact/Deal/Note from the Task dropdown.
Map Fields
Now, map the selected form fields to the corresponding Agile CRM fields.
Contacts
To add contacts to Agile CRM, you must fill in at least the email and name fields.
While these fields are the minimum requirement, you can also include additional information, such as phone number, company name, address, or any custom fields, to create a more detailed contact profile.
Deals
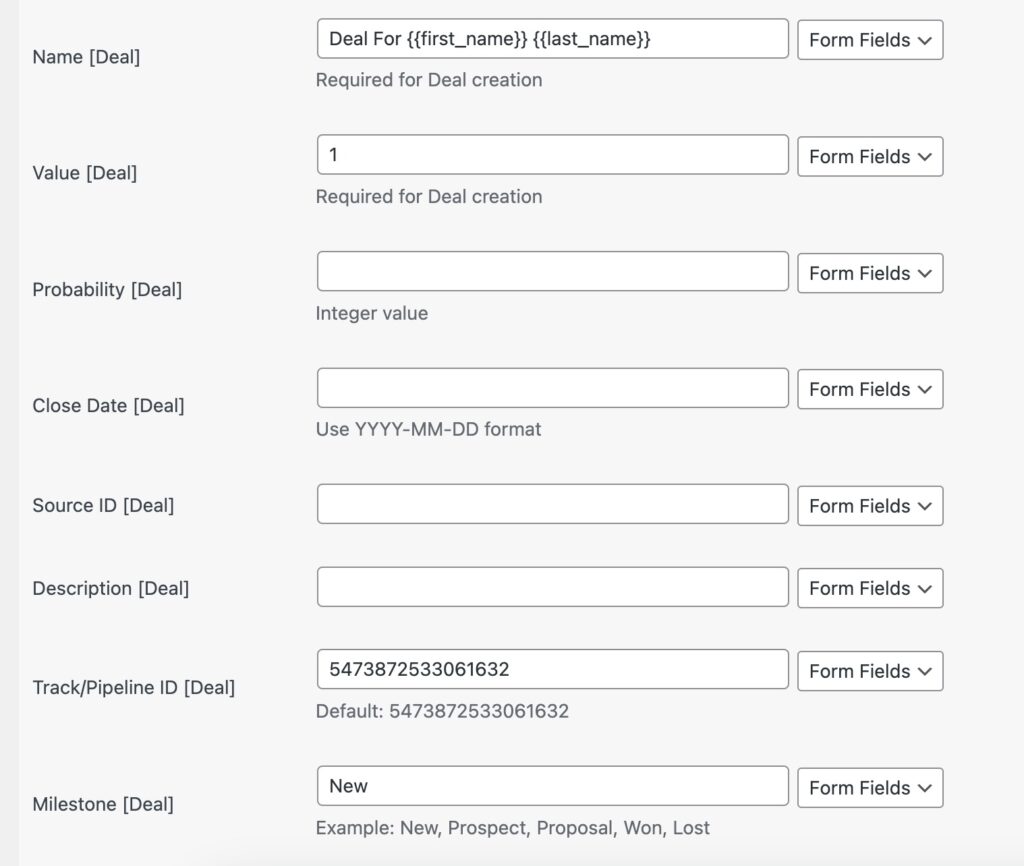
Creating deals is straightforward with Agile CRM integration. To set up a deal, you need to fill in the required deal fields. It’s important to note that the following four fields are mandatory and must be completed for the deal to be successfully created:
- Deal Name: Provide a clear and descriptive name for the deal, as this will help identify it in your CRM.
- Deal Value: Specify the monetary value associated with the deal. This is crucial for tracking potential revenue. If you don’t have an exact value, you can enter a placeholder, such as
1, as a sample value. - Pipeline ID: Select Enter the pipeline ID to assign the deal to a specific sales process.
- Milestone: Define the milestone stage the deal is currently at within the pipeline. This helps in tracking the progress of the deal.
Ensure all these fields are correctly filled out to avoid errors during the integration process. Once these mandatory fields are set, you can optionally fill out other deal fields to provide additional details about the deal.
Tags
- Manually Add Tags: Simply type the tag names directly into the designated field. For example, you could enter
Customer,Lead,Priority, etc. - Map Form Fields: If you want to dynamically assign tags based on form input, you can map a form field. For instance, if your form has a field for tags, you can use its placeholder, such as
{{tags}}.
Customer,Lead,Priority or use a form field like {{tags}}.
Important: The tag must already exist in Admin Settings > Tags in your Agile CRM account. If the tag has not been created there, it will not be applied during the integration. Make sure to pre-create any tags you plan to use. 
Custom Fields
key=value format. For example, if you want to add an age field with a value of 25, you would enter it as: Age=25.
If you need to add multiple custom fields, separate them using a double pipe (||) without any spaces. For example, to add both age and country, you would write: Age=25||Source=Website.
Additionally, you can use form field tags to dynamically map data. For instance, to map the Age and Source fields from your form, you can use: Age={{age}}||Source={{source}}. Here, {{age}} and {{source}} are placeholders for the actual values submitted through the form.
Ensure you follow this structure to correctly map custom fields or form field tags. 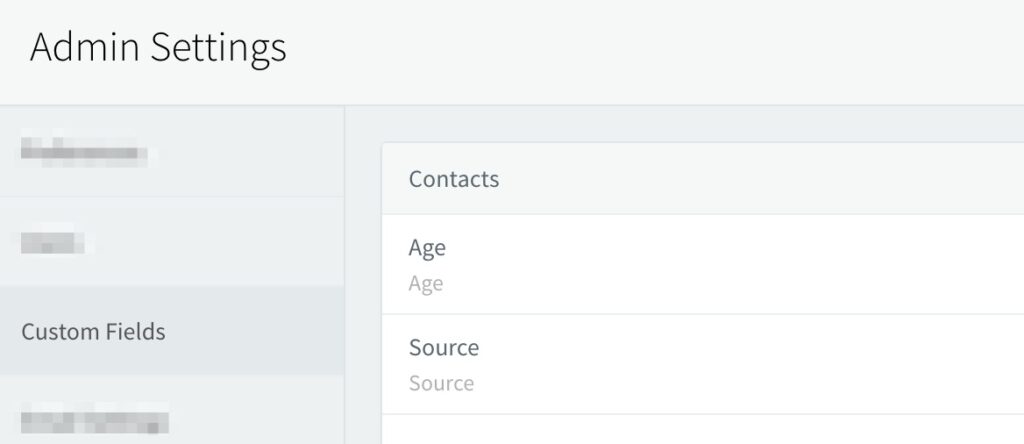

Note
To add a note in Agile CRM, you must provide both the note subject and the note description. The note subject is a mandatory field and must be filled in for the note to be created successfully.
Typically, a note is associated with a contact. However, if you also fill in the deal fields, the note will be linked to that deal in addition to the contact. This allows you to add context-specific notes to either the contact, the deal, or both, depending on the data you provide.
Save Integration
Finally, click the Save Integration button to complete the setup. Once saved, your integration is ready to use. You can now proceed to test the setup to ensure everything is working as expected.
Troubleshooting
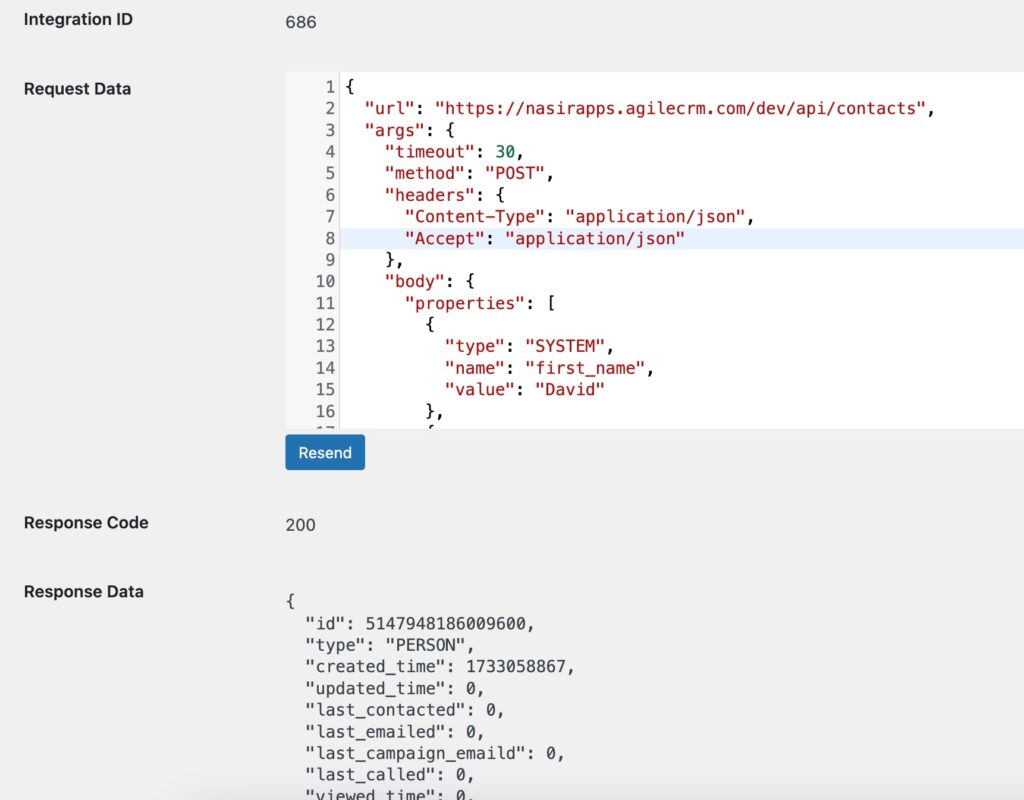
After the integration is set up, when users submit data through the platform, the plugin automatically sends the data to the configured platform. It also records a log detailing the data sent and the response received from the platform.
If an integration isn’t working as expected, the first step is to check these logs. Go to the AFI > Log menu and review the recent logs to identify any issues or errors in the process. This helps you troubleshoot and resolve problems effectively.
If you need assistance, email us at [email protected] with the details of the issue and a copy of the log. To copy the log, simply click the Copy button provided in the log section. This will help us diagnose and resolve the issue quickly.
