AFI
AFI
Dynamics 365 Business Central
Microsoft Dynamics 365 Business Central is Microsoft’s ERP solution for small and mid-sized businesses, covering accounting, inventory, and customer management. Advanced Form Integration sends form submissions to Business Central as new customers or contacts.
What you’ll need
- An active Business Central tenant.
- An Azure AD app registration with Client ID, Tenant ID, Client Secret, granted the Business Central API permissions.
- Your Business Central environment name and company ID.
- The Advanced Form Integration plugin installed and activated.
Connect Business Central to AFI
- In WordPress, go to AFI → Settings → Dynamics 365 Business Central.
- Enter the Tenant ID, Client ID, Client Secret, environment name, and company ID.
- Click Save Changes.
Create the integration
- Go to AFI → Add New.
- Configure the trigger.
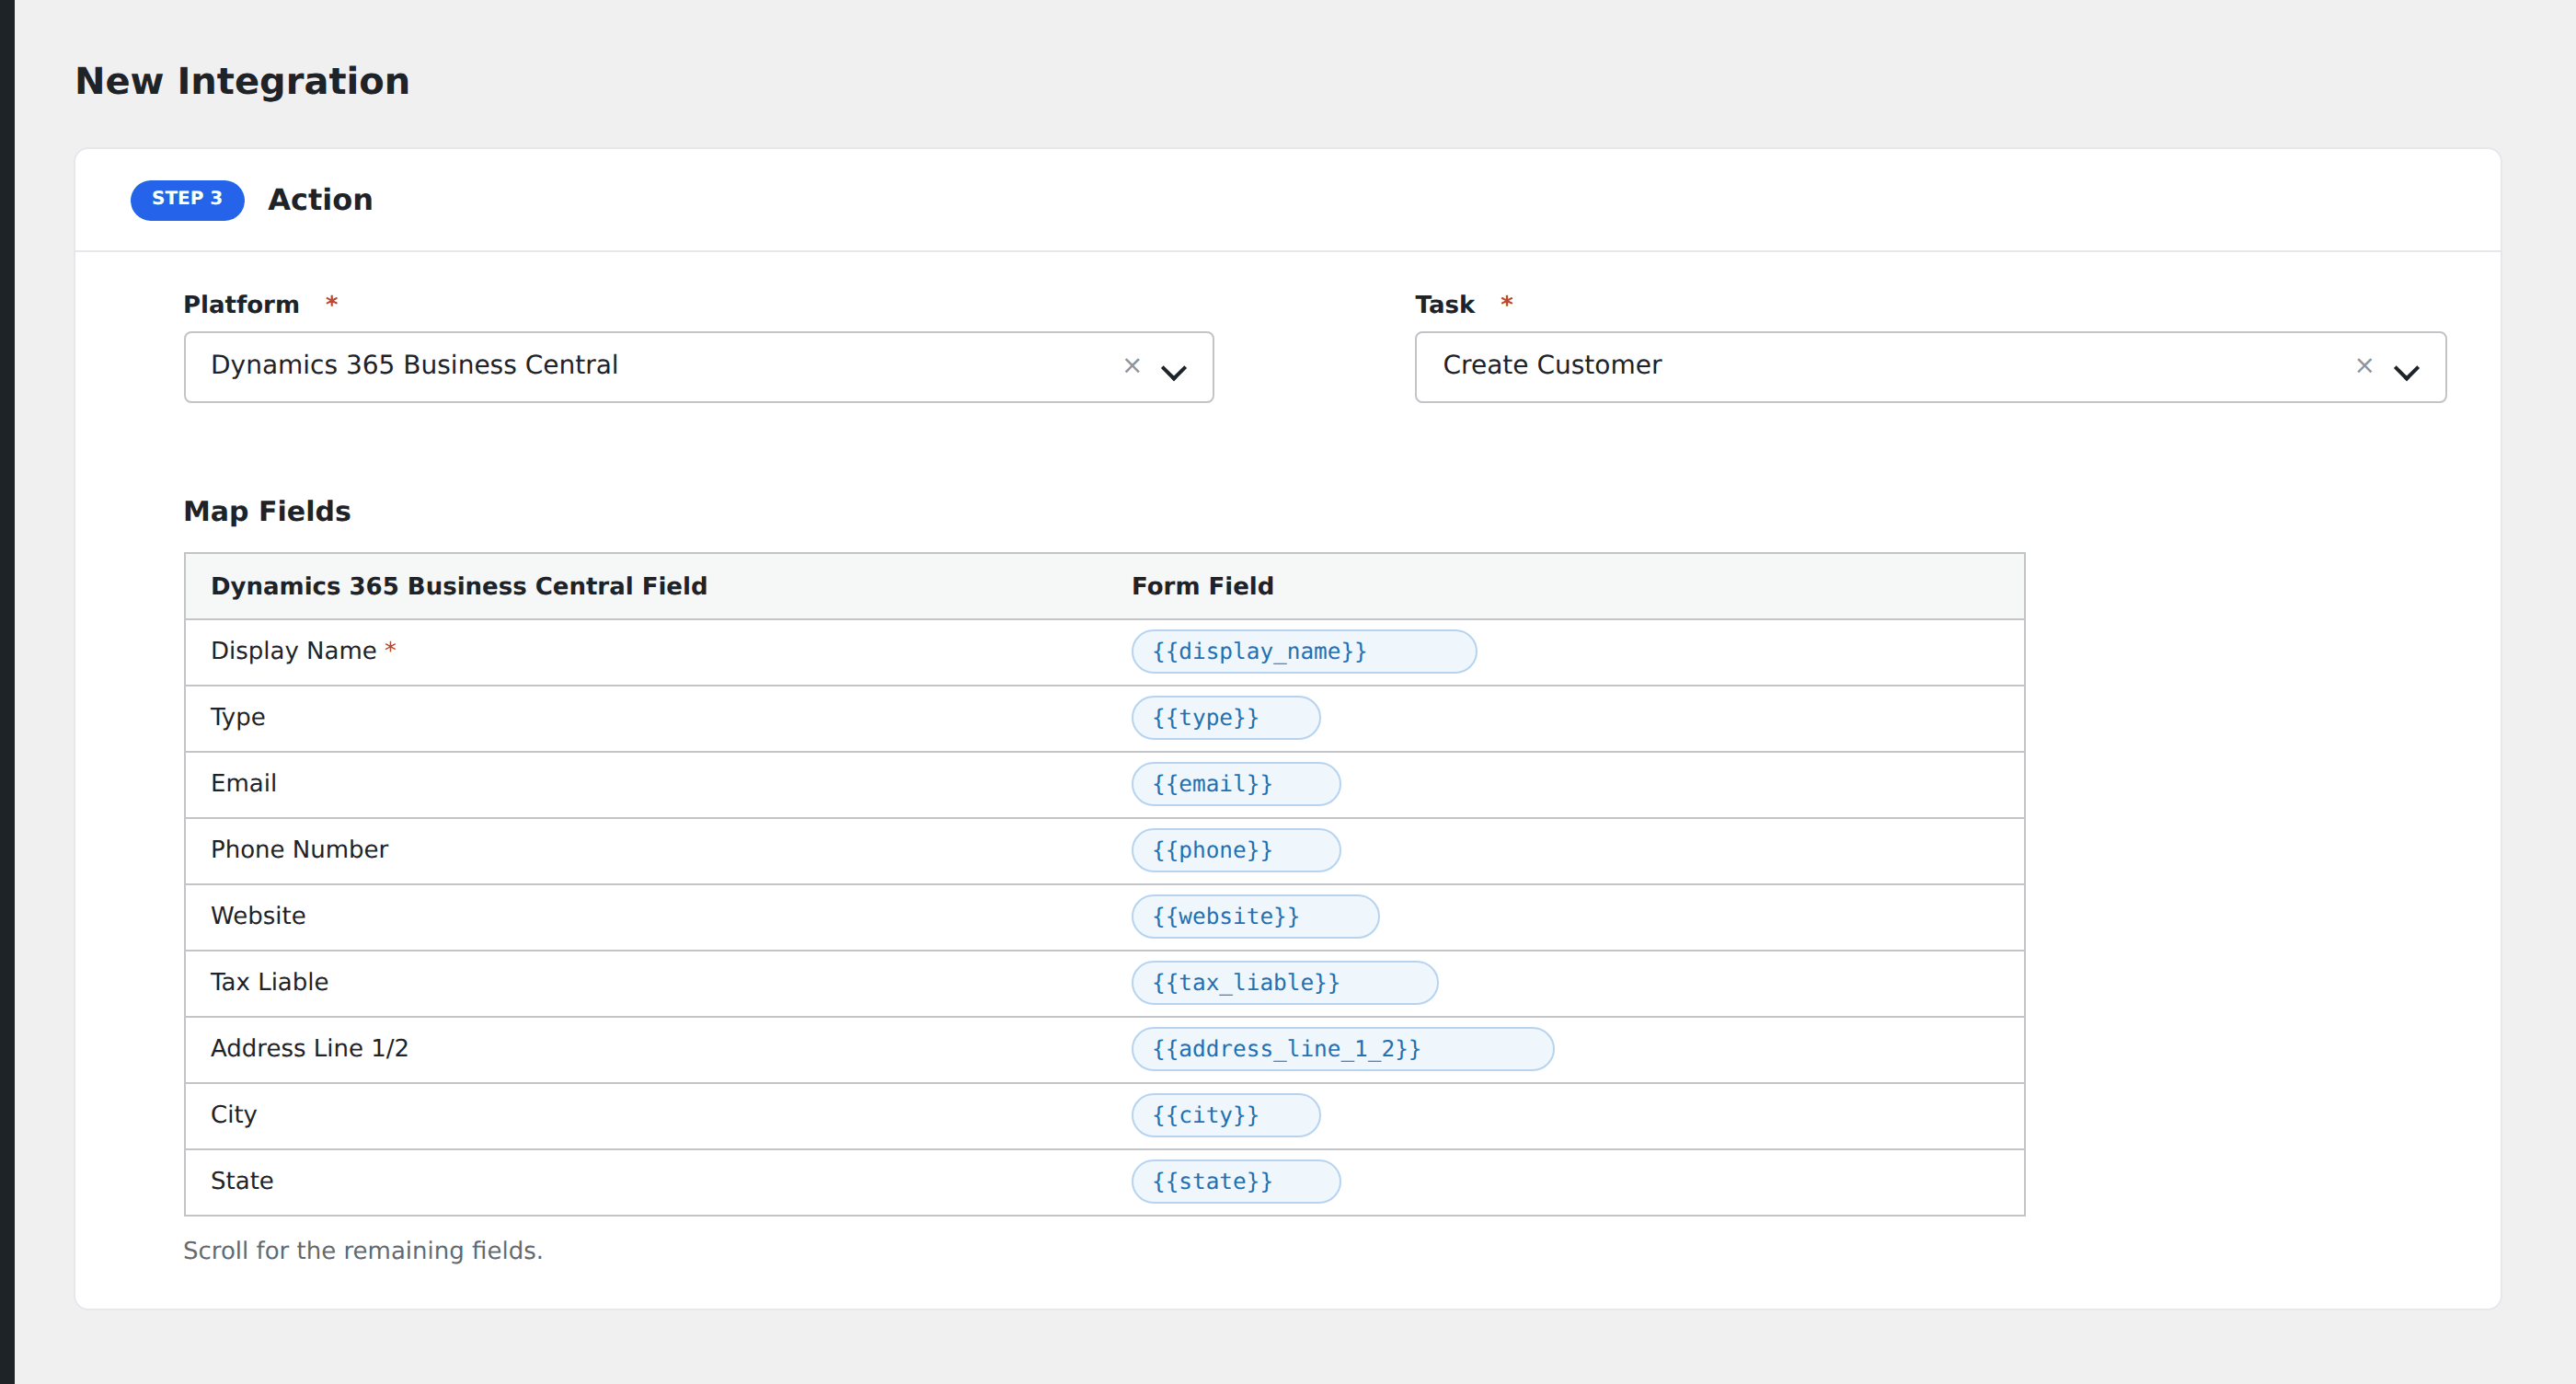
- In Action → Platform, select Dynamics 365 Business Central.
- In Task, choose Create Customer or Create Contact.
- Map the form fields:
- For customer: Display Name (required), Type (Company / Person), Email, Phone Number, Website, Tax Liable.
- Address Line 1/2, City, State, Country/Region Code, Postal Code.
- Currency Code, Payment Terms Code.
- For contact: similar fields plus Company Number to link to an existing customer.
- Optional: configure Conditional Logic.
- Click Save Integration.