Campaign Monitor
Overview
The Advanced Form Integration (AFI) plugin allows you to connect your WordPress forms to Campaign Monitor, enabling you to automatically add or update subscribers on your Campaign Monitor email lists. You can map basic fields like name and email, and with AFI Pro, you can also handle custom fields.
This is ideal for growing and segmenting your email audience directly from form submissions on your website.
https://youtu.be/Z3BVVRkbOa8
✅ Supported Features
| Feature | Free | Pro |
|---|---|---|
| Add or update contact (name + email) | ✅ | ✅ |
| Map to specific client and list | ✅ | ✅ |
| Support for custom fields | ❌ | ✅ |
🔧 How to Set Up
Step 1: Connect Your Campaign Monitor Account
-
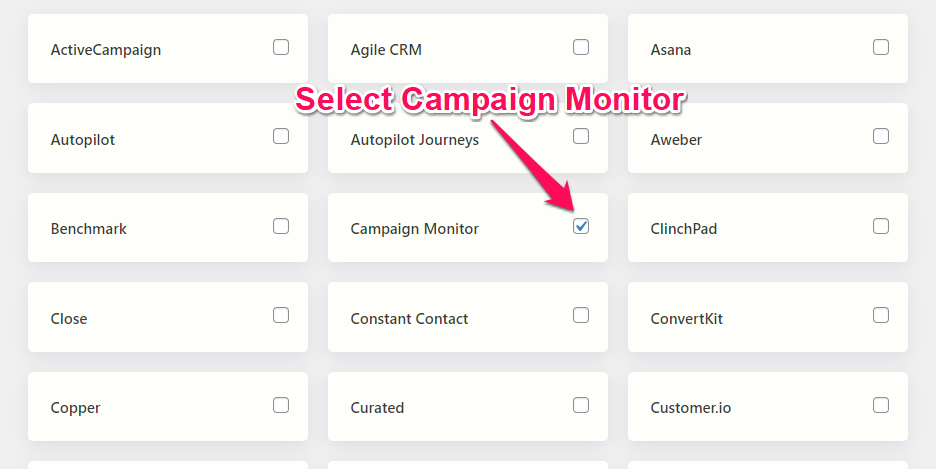
Go to AFI > Settings > General
-
Find Campaign Monitor in the list and toggle it ON
-
Click Save Changes
-
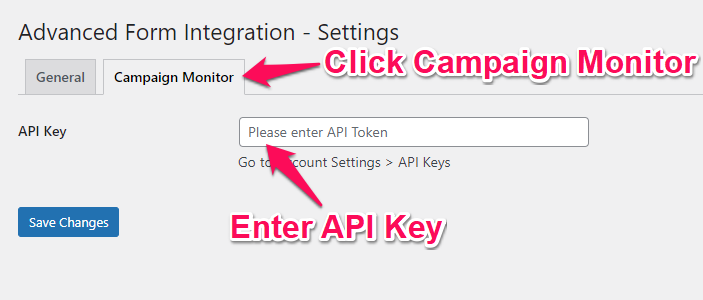
A new tab named Campaign Monitor will appear — click it
-
Enter your API Key
How to Get the API Key:
-
Log in to your Campaign Monitor account
-
Go to Account Settings > API Keys
-
Copy the key and paste it into the AFI plugin settings
-
Click Save Changes
Step 2: Create a New Integration
-
Go to AFI > Add New
-
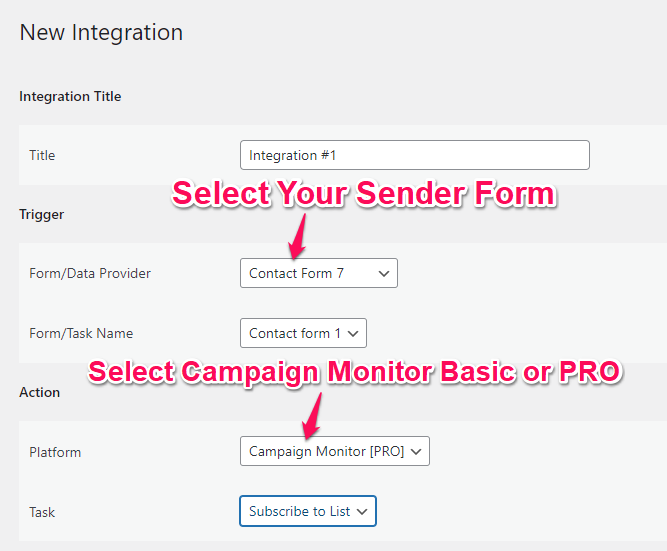
Provide a meaningful title like:
“Subscribe via Contact Form 7 to Newsletter List”
Step 3: Configure the Trigger
-
Form Provider: Choose your plugin (e.g., Contact Form 7, WPForms, Elementor)
-
Form/Task Name: Select the specific form that you want to connect
Step 4: Configure the Action
-
Platform: Select Campaign Monitor
(For Pro features, select Campaign Monitor [PRO]) -
Task: Choose Subscribe to List
Step 5: Map Fields
-
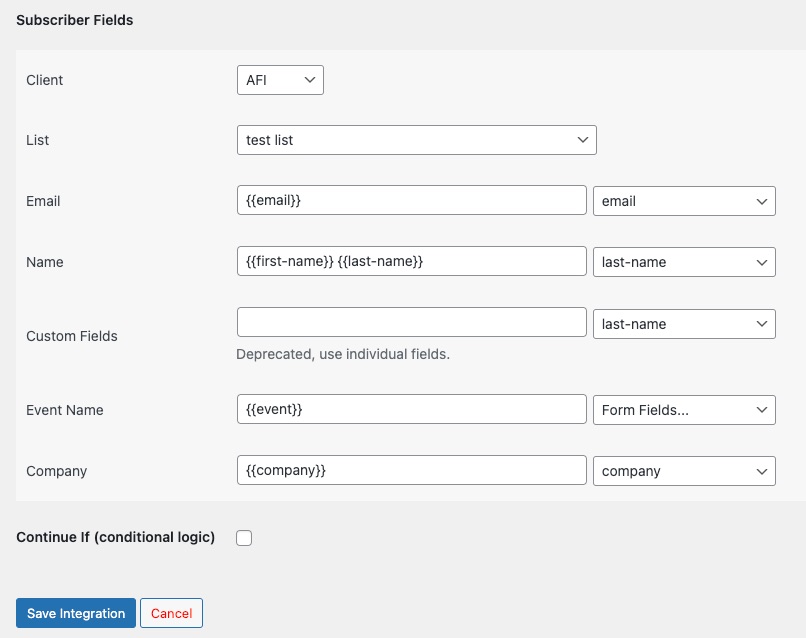
Select a Client → The plugin will fetch all your Campaign Monitor clients
-
Select a List → The plugin fetches all lists under the selected client
-
Map these fields:
Free Version
-
Email (required)
-
Name
Pro Version
In addition to the above:
-
All custom fields from Campaign Monitor will be loaded
-
You can map them to your form fields accordingly
Step 6: Save Integration
Click Save Integration at the bottom of the page.
You’re done! New form submissions will now sync directly with your selected Campaign Monitor list.
Troubleshooting
After the integration is made, when users fill up the form and submit it, the plugin initiates the process of sending data to the configured platform. It also saves a log that includes what data it tried to send, and what it got in response from that platform. So if you find an integration is not working, your first task is to check the logs. Go to [direction]AFI > Log[/direction] menu and check the recent logs.
