 AFI
AFI
SiteOrigin Contact Form
The SiteOrigin Contact Form widget ships with the SiteOrigin Widgets Bundle and is often used inside Page Builder layouts. With Advanced Form Integration (AFI), every submission of a SiteOrigin contact form can be sent automatically to other platforms: add a row in Google Sheets, subscribe the sender to Mailchimp, or create a lead in a CRM like HubSpot or Pipedrive.
What You’ll Need
- The SiteOrigin Widgets Bundle installed, with the Contact Form widget enabled
- A page containing at least one SiteOrigin contact form
- The AFI plugin (free) installed and active
- An account on the receiving platform you want to connect
How AFI Identifies Your Forms
SiteOrigin contact forms are widgets, not separate form posts, so they don’t have a regular form ID. AFI identifies each form by a unique hash and shows it in the dropdown as “Contact Form (hash)” together with the page it appears on. If you have several forms, open the page in another tab to confirm which is which before selecting.
How to Create the Integration
- Go to AFI > Add New in your WordPress admin.
- A default title is auto-filled in the Integration Title box. Rename it to something recognizable, like “SiteOrigin Contact to Google Sheets”.
- In Trigger > Form Provider, select SiteOrigin Contact Form. The Widgets Bundle must be active, otherwise the provider won’t appear.
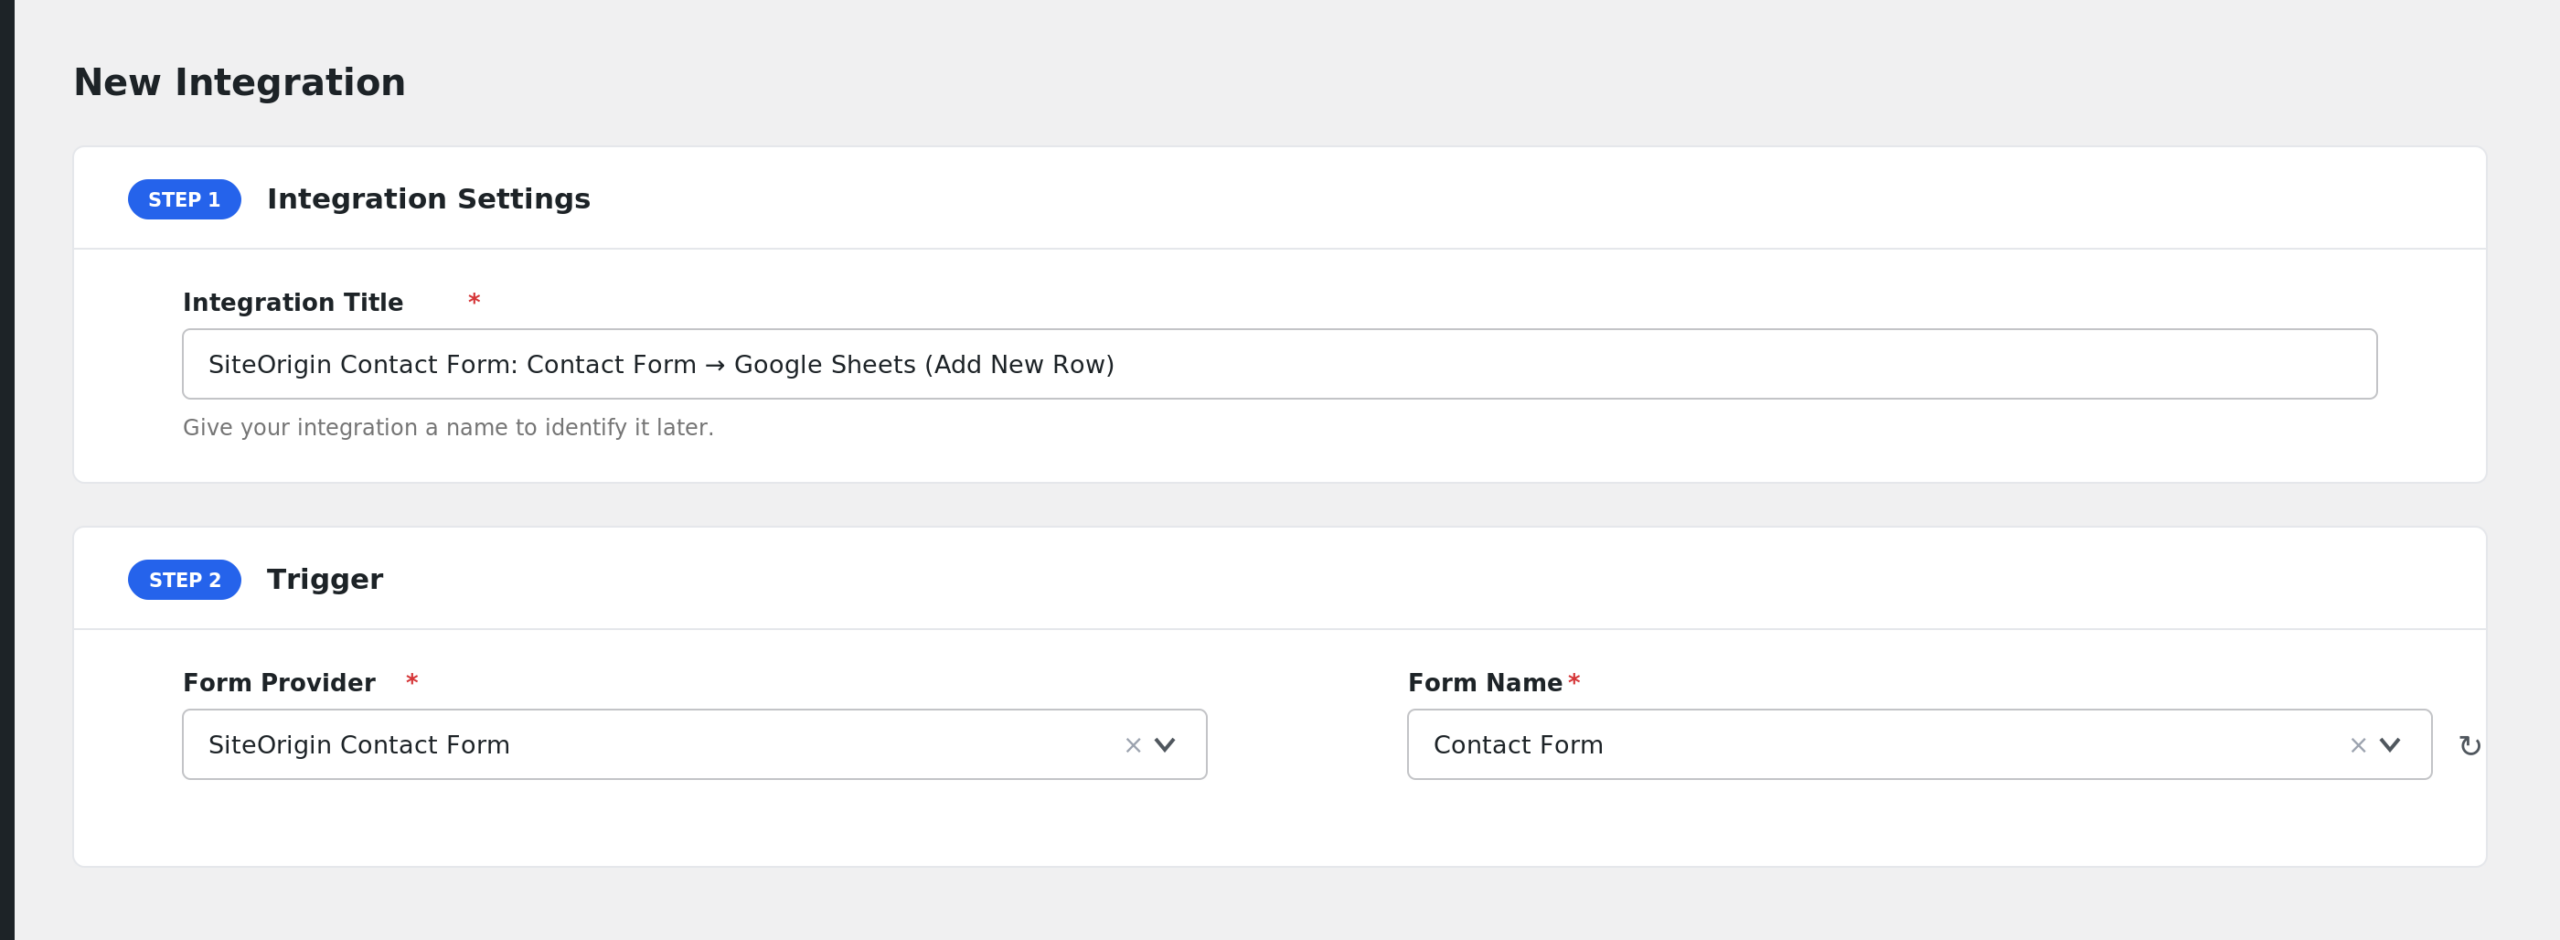
- Pick your form in the Form/Task Name dropdown. Forms are listed with their hash and page title.
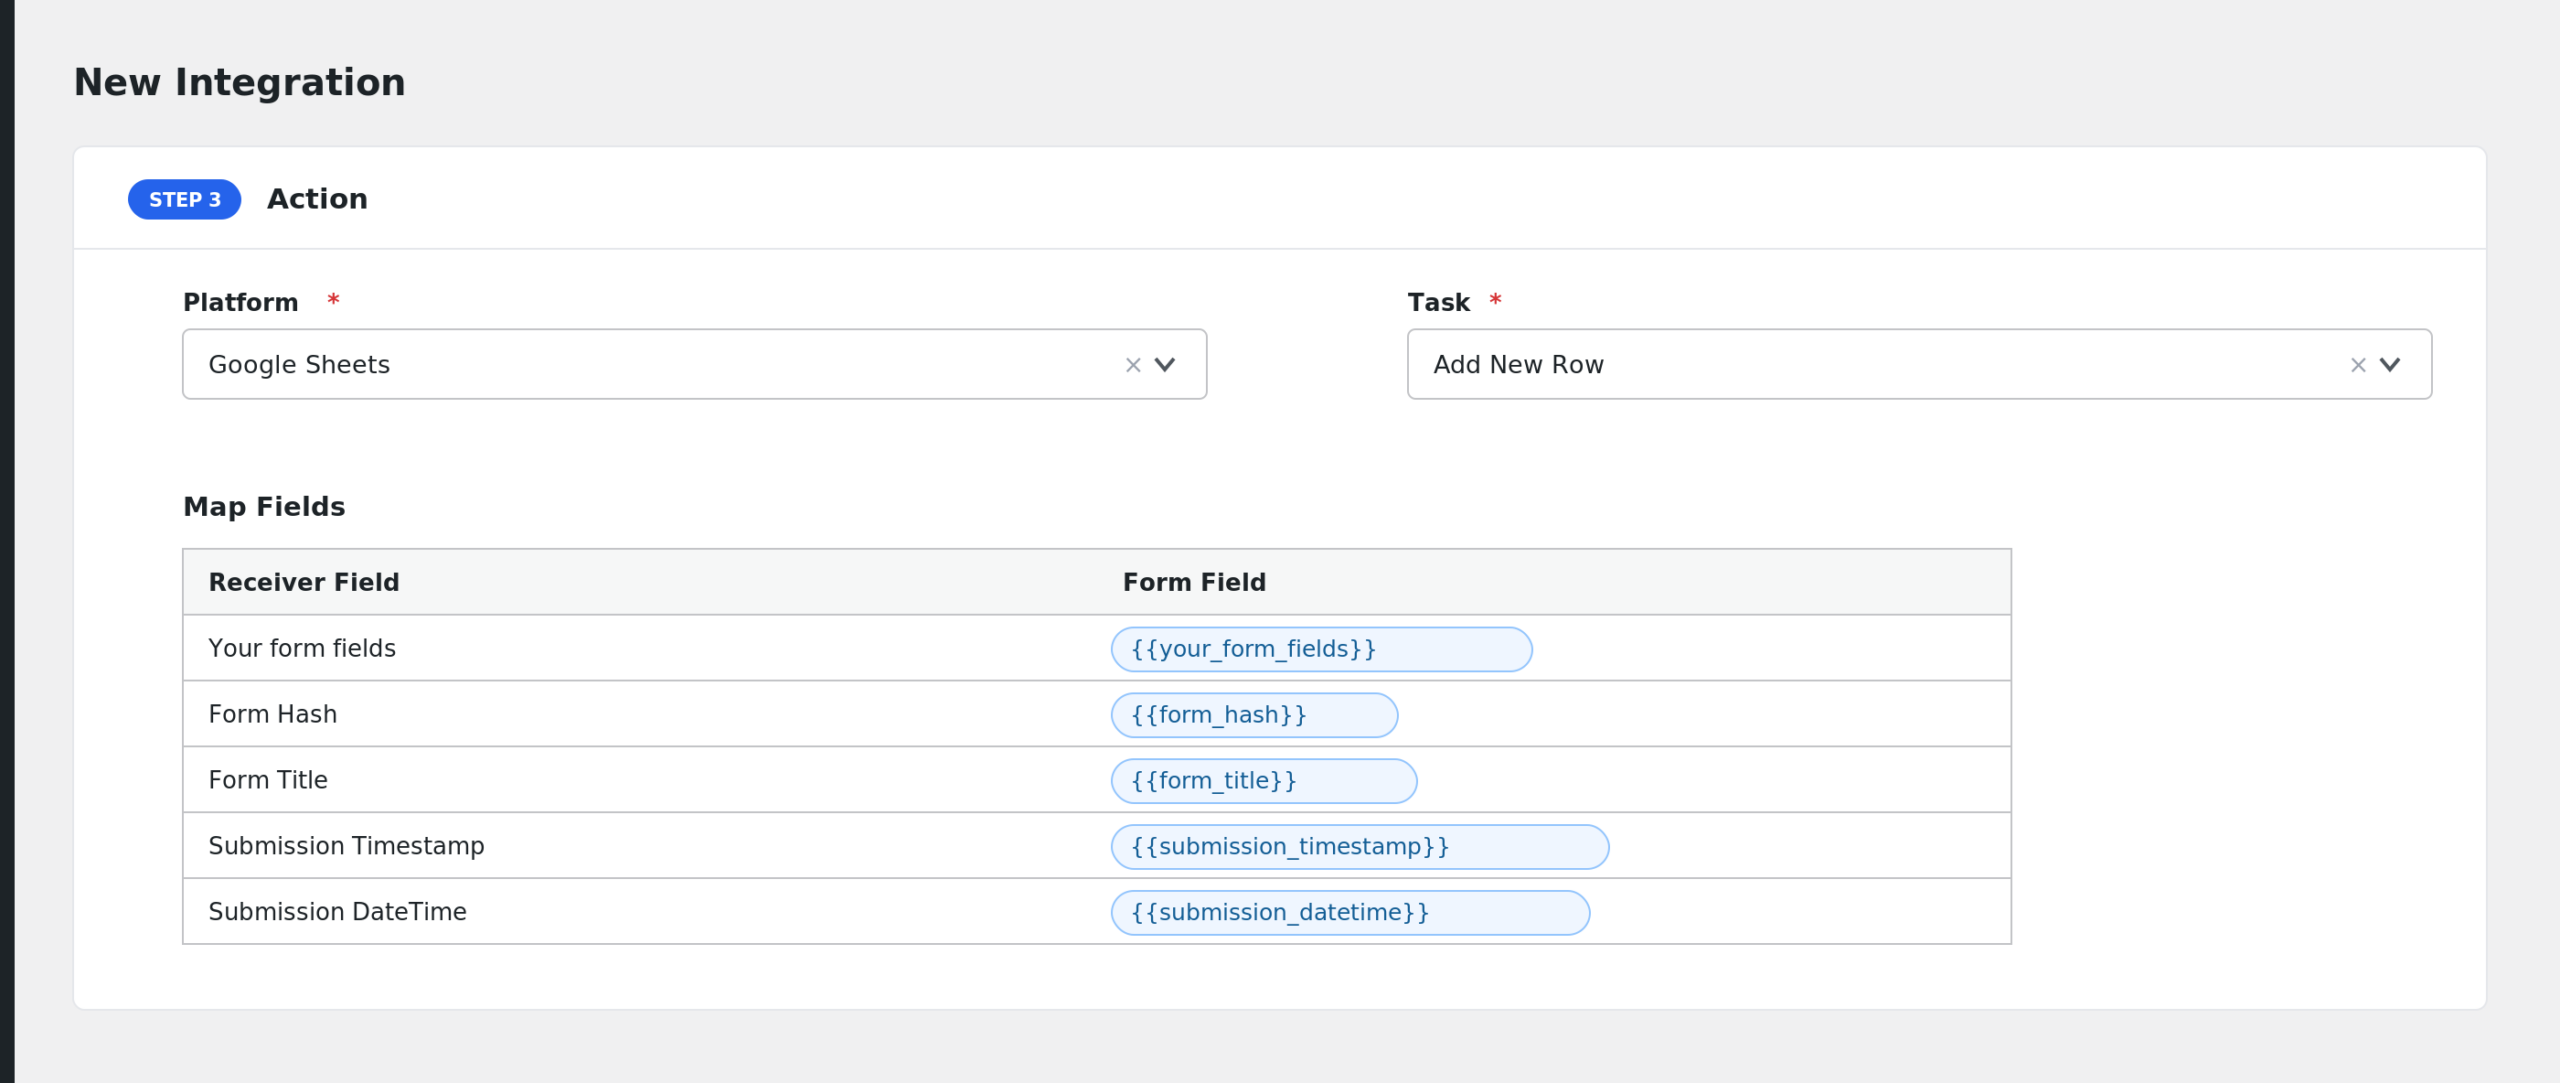
- Under Action, select the receiver platform and its task.
- Map the form fields to the receiver’s fields.
- Add Conditional Logic if needed (optional).
- Click Save Integration, then submit a test entry on the live page.
Fields You Can Send
Every field you added to the widget is available under its label, and each one also has a “(Label)” variant that sends the field’s label text instead of the value. These standard fields are always included:
| Field | Description |
|---|---|
| Your form fields | Name, Email, Subject, Message, and any custom fields you added to the widget |
| Form Hash | The unique identifier AFI uses for this form |
| Form Title | The form’s display title |
| Submission Timestamp | Unix timestamp of the submission |
| Submission DateTime | Human-readable date and time |
| Submission URL | The page URL where the form was submitted |
| User IP | The visitor’s IP address |
| User Agent | The visitor’s browser information |
| Notification Email (To) | The address the widget sends its notification to |
| Notification Email (From) | The From address of that notification |
Conditional Logic Example
If your form has a Subject field and you only want support requests sent to your helpdesk platform, add a condition: select the subject field, choose Contains, and enter “support”. Other submissions will be skipped for this integration.
Troubleshooting
SiteOrigin Contact Form is not in the Form Provider dropdown
Make sure the SiteOrigin Widgets Bundle is active and the Contact Form widget is enabled under Plugins > SiteOrigin Widgets.
My form is not listed, or I can’t tell which hash is which
AFI discovers forms by scanning your published pages for contact form widgets. Save and publish the page containing the form, then reload the New Integration screen. The dropdown label includes the page title to help you tell forms apart.
Submissions are not arriving at the receiver
Go to AFI > Log and check the latest entries. The log records the data AFI sent and the receiver’s response, which normally identifies the problem right away.