Contact Form 7
Overview
Contact Form 7 is the most popular contact form plugin in WordPress with above 5 million active installs. You can easily integrate it to many other popular platforms using the Advanced Form Integration plugin. It is supported in the basic free version of the AFI plugin.
Possible Integrations
When a user fills a form in your website, it is possible to send the data in many ways, like:
- Create a new row in Google Sheets with the submitted data. Like: first name, last name, email, and all other fields.
- Create a new contact in a certain Mailchimp list.
- Create a new contact in a certain Sendinblue list.
- Create an organization, contact, deal, note, activity in Pipedrive CRM.
- Similar integration to 50+ other platforms. Please check out the supported list here.
Supported Form Fields
Here is the list of supported form fields in Contact Form 7 that can be sent over to other platforms:
| Field | Supported | Output Format |
|---|---|---|
| Text | Yes | Same as input |
| Yes | Same as input | |
| URL | Yes | Same as input |
| Tel | Yes | Same as input |
| Number | Yes | Same as input |
| Date | Yes | In YYYY-MM-DD format |
| Textarea | Yes | Same as input |
| Dropdown | Yes | Only selected option value. When pipe is used, the right side value will be sent. To get the left side value, use [x]_before tag. See details below. |
| Checkbox | Yes | Comma-separated selected values. When pipe is used, the right side value will be sent. To get the left side value, use [x]_before tag. See details below. |
| Radio | Yes | Only selected option value. When pipe is used, the right side value will be sent. To get the left side value, use [x]_before tag. See details below. |
| Acceptance | Yes | When selected, 1 will be sent. Otherwise "", an empty value |
| File Upload | Yes | Using another plugin. See instructions below. |
Creating a new integration
Here below a brief description on how easily you can start an integration.
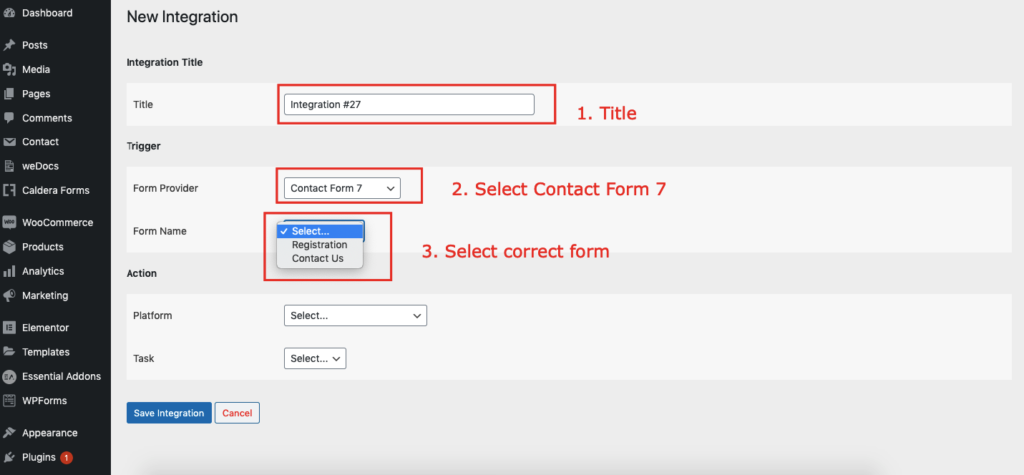
- Go to
WordPress Admin > AFI Menu > Add New. - A default title will be auto-filled in the Integration Title input box. You can change it to something relevant.
- In
Trigger > Form/Data Providerselect Contact Form 7. - The
Form/Task Namedropdown will show a list of form names. Select the form you want to connect. - In
Action > Platformdropdown, select the platform name to where you want to send the data. If you don’t see the platform, go to plugin settings page and activate it. Complete the fields mapping. It can be different for different platforms. Please check out the documentation page for Receiver Platforms. - Conditional Logic can be applied if required.
- Click on Save Integration button and you are done.

Obtain both values while using pipes
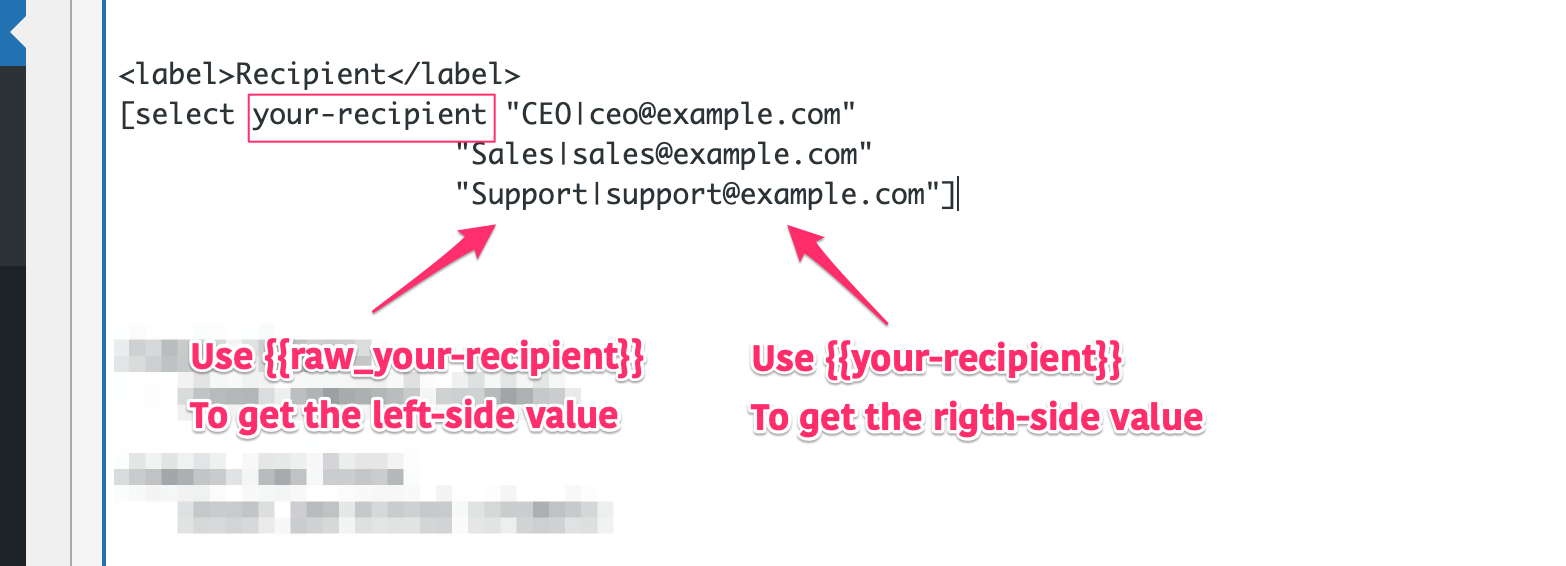
If you use pipe in the fields like Dropdown, Radio or Checkbox, upon submission you will get the right-side value usually. To get the left-side value add the text ‘raw_’ before the field tag. So if the field tag is {{your-recipient}}, use {{raw_your-recipient}} to get the left-side value. See the screenshots below:

“Agree to Terms and Conditions” Checkbox
Most of the time, a form will have an option to get users acknowledgements that they agree to the terms and conditions. It is often presented by a checkbox. In the AFI plugin, you can use a conditional logic so that only those submissions will be sent to the integration process who marked this checkbox. Contact Form 7 has a dedicated checkbox field called “acceptance” for this sole purpose. You can add this “acceptance” checkbox to the form to get user’s consent. On submission, the value “1” will be sent when user marks this checkbox.
To create such a condition, follow the steps below:
- Add a new condition in the Conditional Logic Section.
- Select the acceptance field from the dropdown menu.
- Select Equal to as the comparison operator.
- Put 1 in the value input box.


If you have used a regular checkbox to get user’s consent (not the acceptance field), then insted of 1, use the checkbox field value in the condition.
File Upload
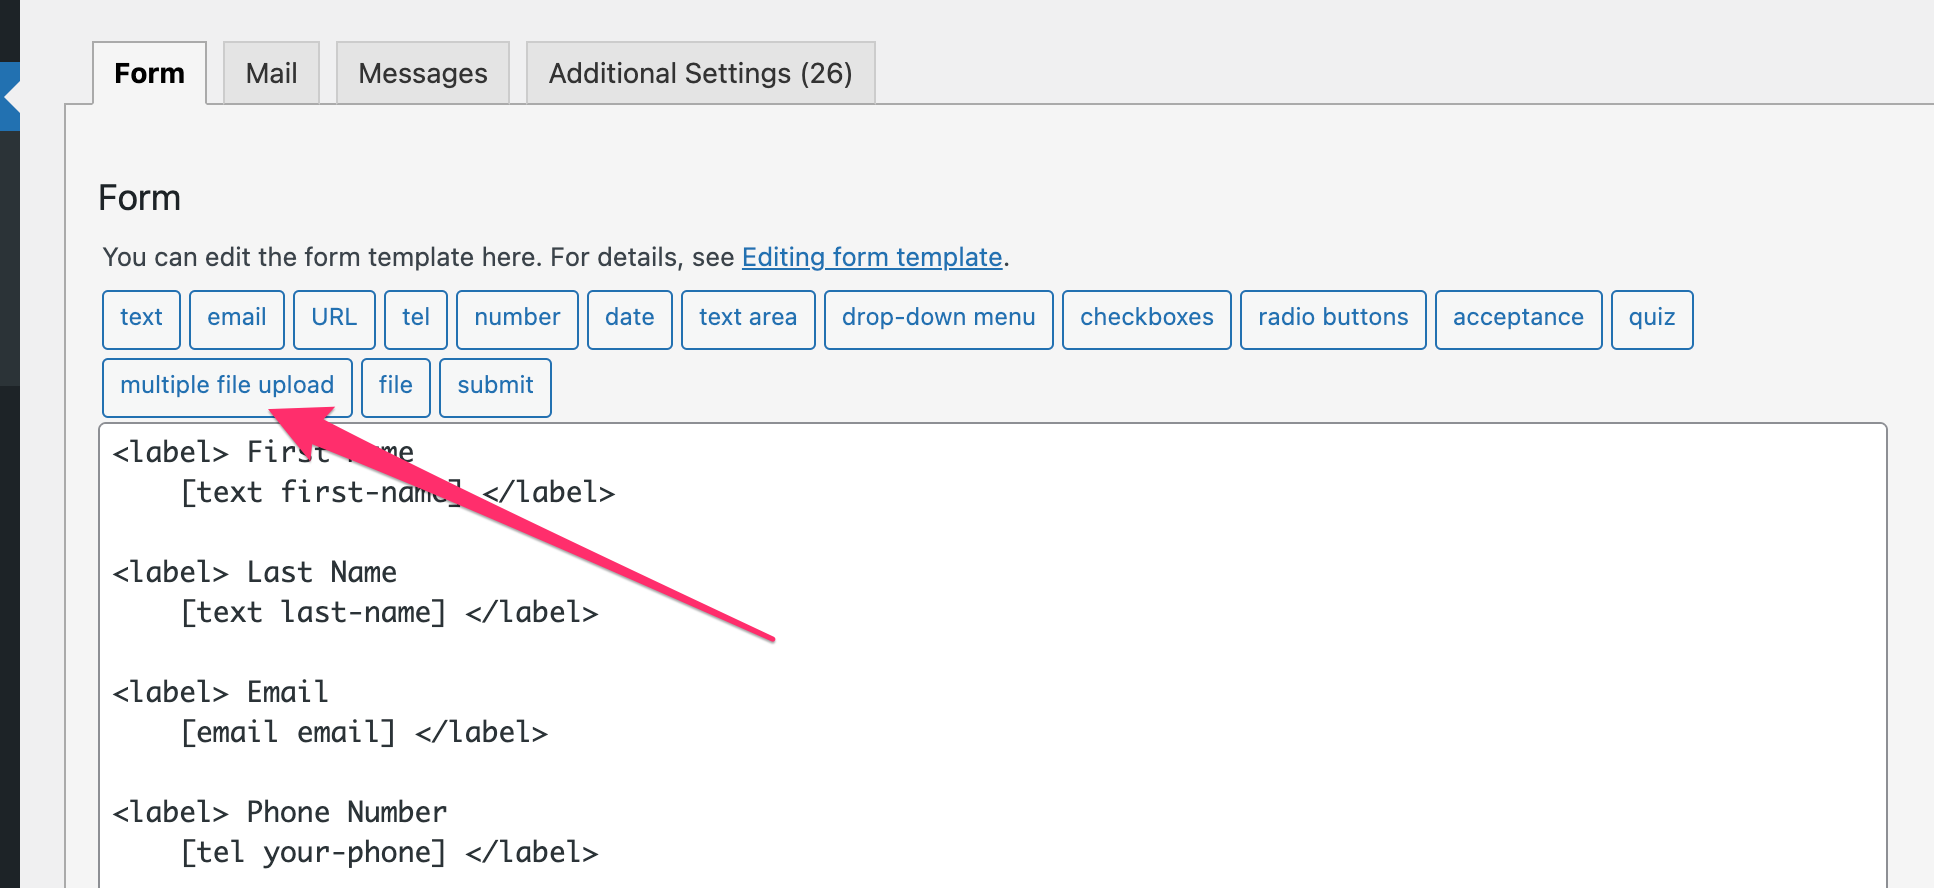
The default Contact Form 7 file upload system uploads the file to a temporary folder, attaches it to notification email(s) and ends the process. So it leaves no file link that we can use afterwards. Thats why when we map the file upload field in a AFI integration, it sends nothing. But there is a workaround we can send the file link. Install the Drag and Drop Multiple File Upload plugin and use its multiple file upload field in the form, instead of default CF7 file field. Then map the field in the AFI integration and it will send the file link after the form submission. We didn’t test other similar file upload plugins but those might work too.
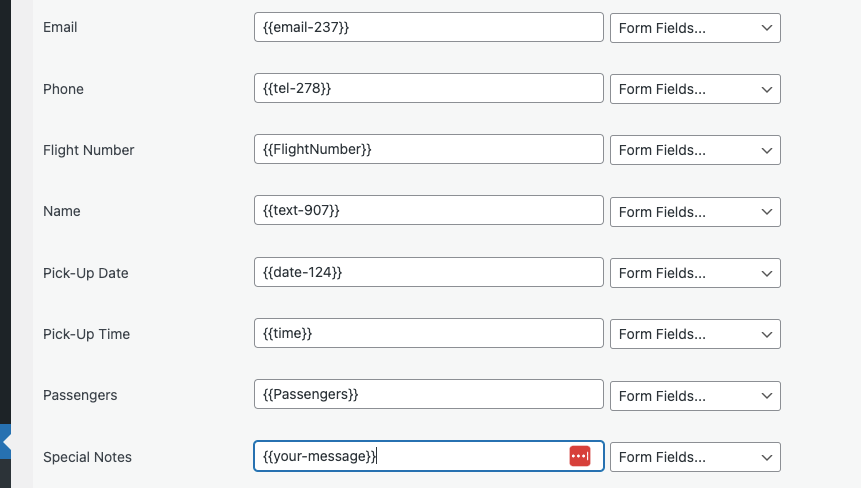
Map Fields Manually
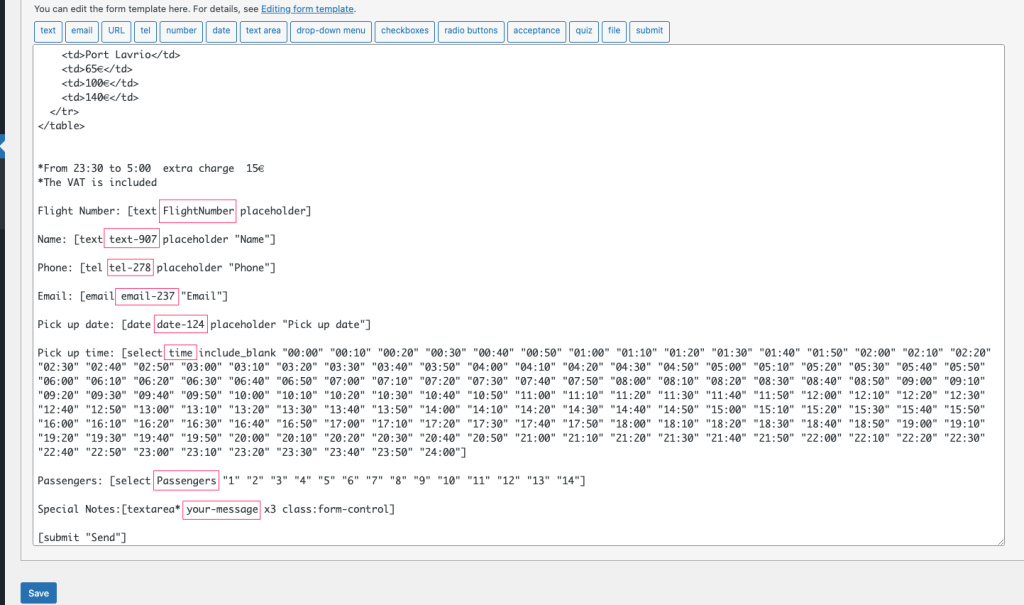
You can manually pick and enter the field ID while mapping the fields, as shown in the images below. Just enclose them with double curly braces.
Integration Example
Please check out this video to see how easily an integration can be done with Mailchimp.
https://youtu.be/0SgWjwQuMYo