Hubspot CRM
Overview
This guide provides a step-by-step walkthrough on integrating HubSpot CRM with the AFI plugin for WordPress. The AFI plugin enables seamless data transfer from WordPress forms to HubSpot CRM, allowing for the automatic creation of various HubSpot objects such as Contacts, Companies, Deals, Products, Tickets, and more when a visitor submits a form on your website. This integration ensures that your HubSpot CRM is always up-to-date with the latest information from your website visitors.
Supported Features
- The basic AFI supports creating or updating contacts including custom fields.
- The AFI Pro version supports adding Calls, Carts, Companies, Contacts, Deals, Products, Tickets, Tasks and Notes.
- The AFI Pro also supports custom objects.
How To Setup
Authentication
First, you need to connect your Hubspot CRM account by authorizing it on the plugin’s settings page.
Go to AFI > Settings > General where you’ll see a list of all the supported platforms. Hubspot, turn it on, and click the Save Changes button at the bottom.

You’ll see a Hubspot CRM tab at the top. Click on it and follow the steps to complete the authorization process.
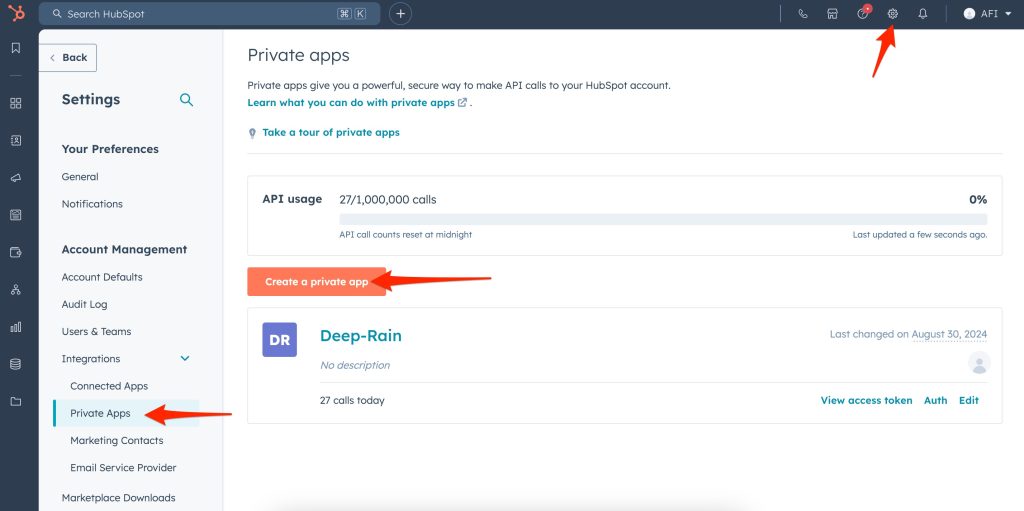
- In HubSpot, go to Settings > Integrations > Private Apps.
- Click on the Create a private app button.
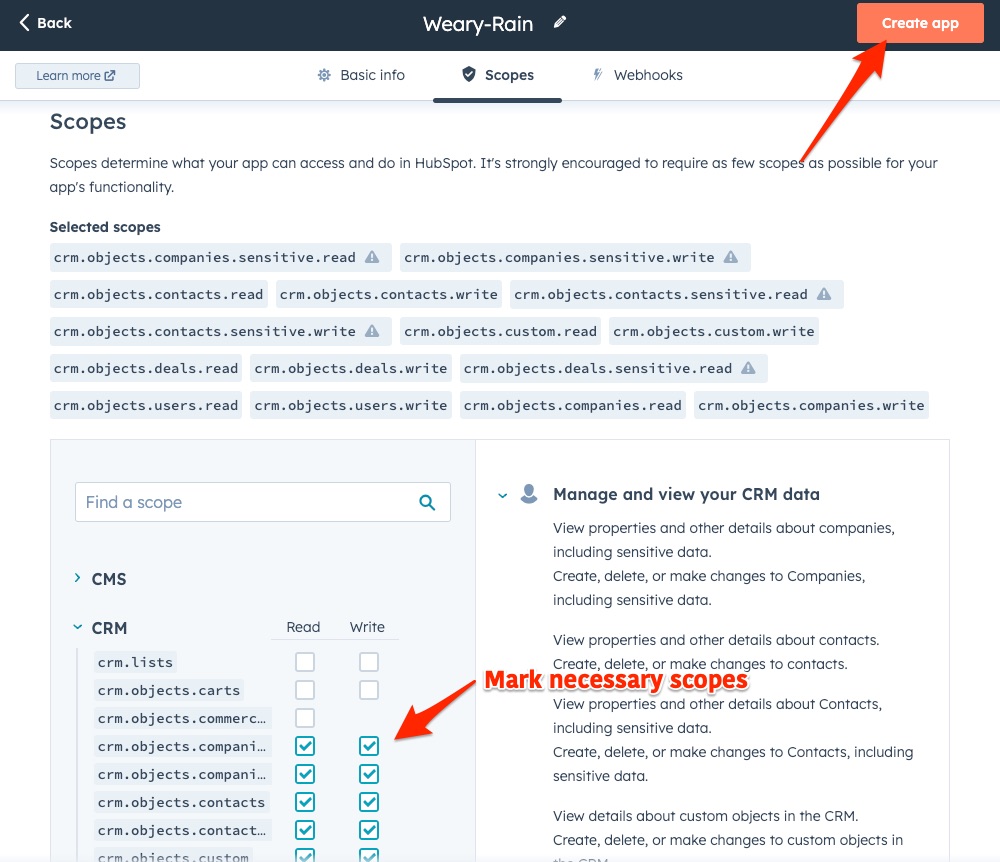
- Go to the Scopes tab, and choose the permissions you need. For example, if you want the plugin to create Companies and Contacts, make sure both read and write permissions are enabled for them.
- Click on Show token and copy the key that appears.
- Paste in AFI > Settings > Hubspot CRM input box and Save.


Create New Integration
After saving your credentials on the settings page, you can begin creating a new integration. Access the New Integration page by clicking on Add New under the AFI menu.
Title
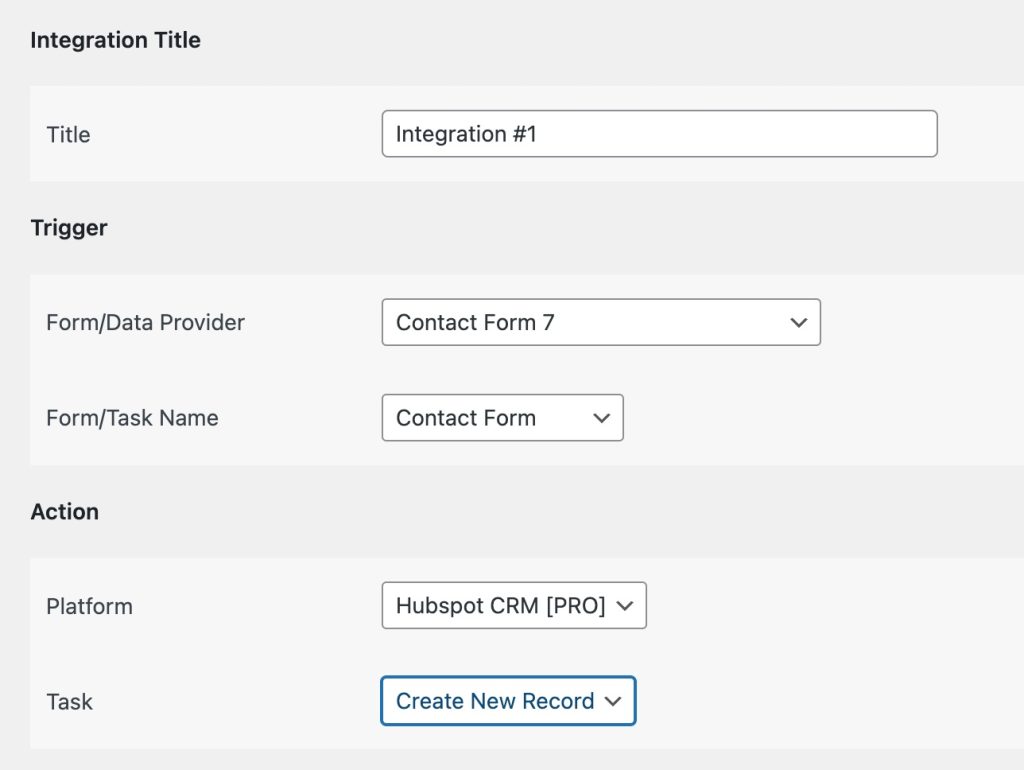
A default title with an auto-incremental number will be generated. However, you can rename it to a name that relates to the specific task. This will enable you to promptly identify the correct integration, particularly when multiple integrations are in place.
Trigger
Choose the desired sender form from the Form Provider dropdown, such as Contact Form 7, Gravity Form, or Elementor Pro Form, that you wish to link. Once selected, all forms constructed under that provider will be retrieved and automatically displayed in the Form/Task Name dropdown. Proceed to select the form that you intend to integrate.
Action
Select Hubspot CRM or Hubspot CRM [PRO] based on your AFI subscription.

Map Fields
In this section, you’ll see two dropdown menus: one for selecting the Owner and another for selecting the Object.
Owner refers to the user in HubSpot that will be associated with the data (e.g., the HubSpot user who will own the new contact or deal). Object refers to the type of HubSpot data you want to create or update (e.g., Contacts, Companies, Deals, etc.).
After selecting the Owner and Object, the plugin will automatically fetch and display all the fields associated with the chosen object. These fields represent the data points in HubSpot, such as first name, last name, email, company name, deal amount, etc.
For each field listed under the selected object, you need to map the corresponding data from your form. For example, if your form collects an email address, you would map the form’s email field to the Email field in HubSpot. Only fill in the necessary fields that are crucial for your integration. You can leave other fields empty if they are not needed.
Once you have completed mapping all the required fields, click Save to finalize the integration. This step ensures that the plugin knows how to transfer the form data into HubSpot when a visitor submits the form on your website.