Constant Contact
Overview
The AFI plugin helps you easily connect popular WordPress forms to Constant Contact. When someone submits a form on your website, the plugin automatically sends their information to your Constant Contact account and adds them to your chosen email list. It can also send extra details like custom fields, tags, and notes.
https://www.youtube.com/watch?v=O4GPQeMSwxw&t=23s
Supported Features
- Creates a new contact and subscribes to a preferred list
- The AFI Pro version supports adding custom fields, note, and tags.
How To Setup
Authentication
First, you need to connect your Constant Contact account by authorizing it on the plugin’s settings page.
Go to AFI > Settings > General where you’ll see a list of all the supported platforms. Find Constant Contact, turn it on, and click the Save Changes button at the bottom.

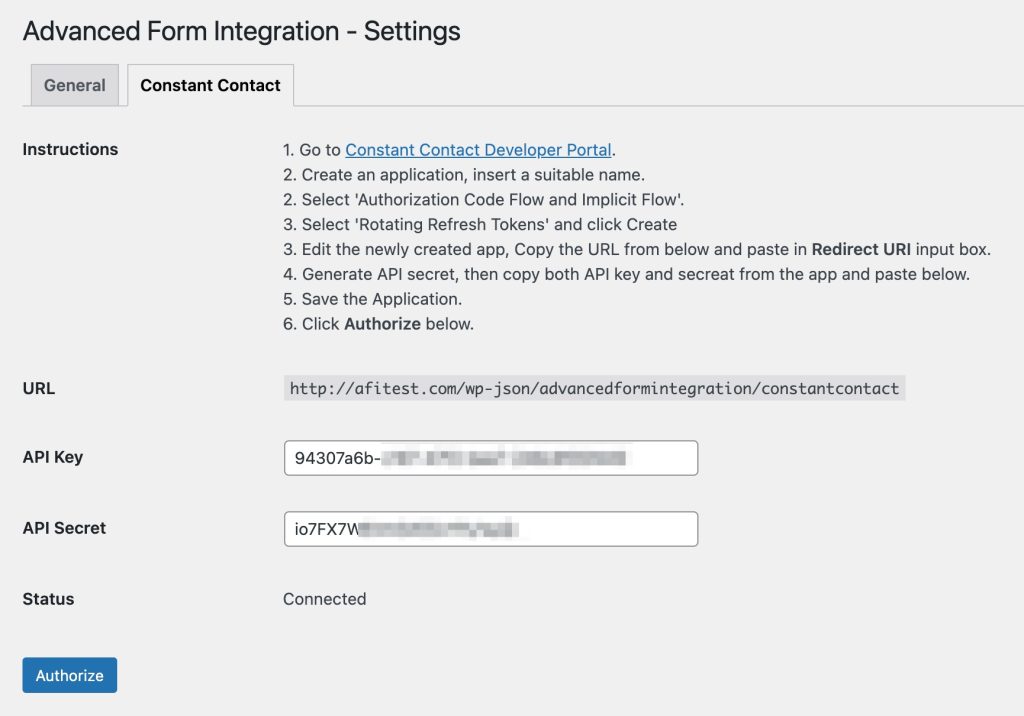
You’ll see a Constant Contact tab at the top. Click on it and follow the steps to complete the authorization process.
- Go to Constant Contact Developer Portal.
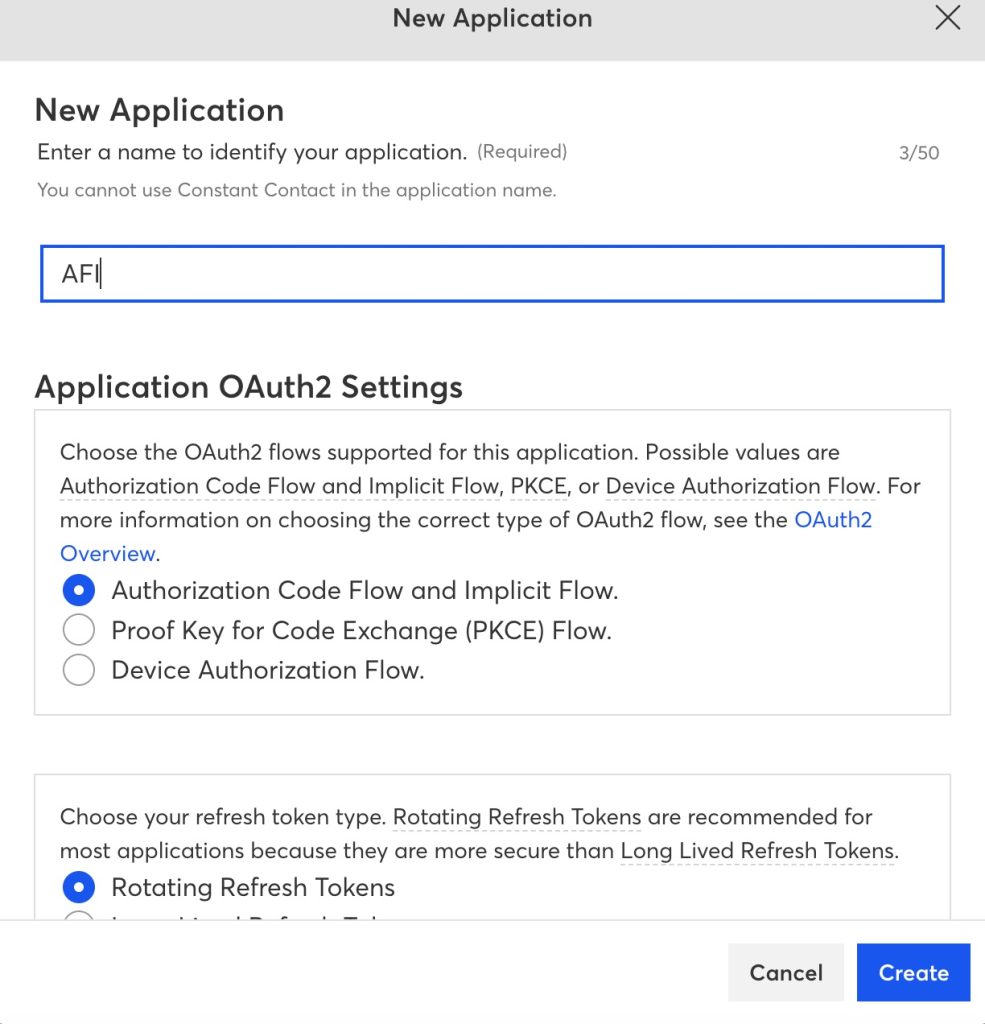
- Create an application, insert a suitable name.
- Select Authorization Code Flow and Implicit Flow.
- Select Rotating Refresh Tokens and click Create.
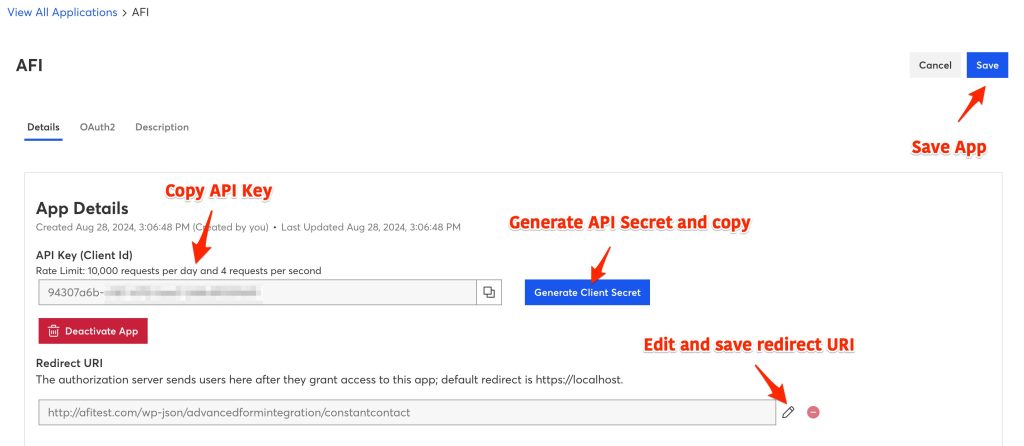
- Click on Edit to go to the app page. Copy the URL and save it to the redirect URI input box and click save.
- Generate API secret, then copy both API key and secret key from the app and paste in the Constant Contact tab input box.
- Save the Application.
- Click Authorize and complete the process.
If you have done everything properly, the Status will show as Connected.
Create New Integration
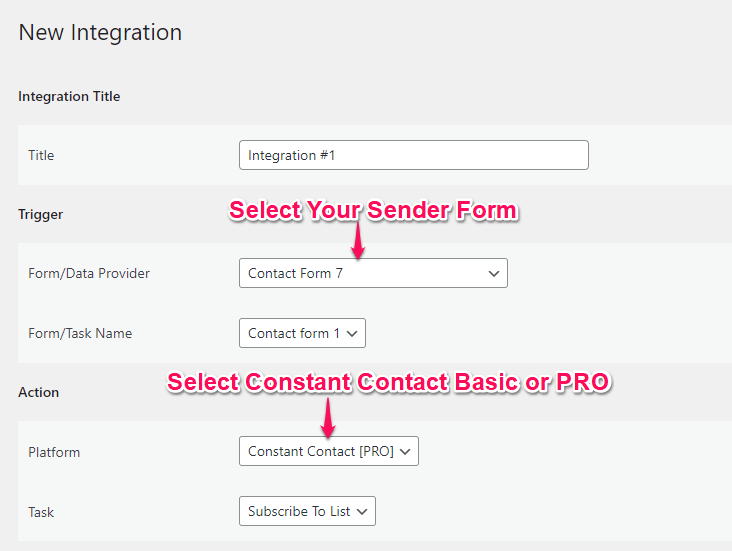
After saving your credentials on the settings page, you can begin creating a new integration. Access the New Integration page by clicking on Add New under the AFI menu.
Title
A default title with an auto-incremental number will be generated. However, you can rename it to a name that relates to the specific task. This will enable you to promptly identify the correct integration, particularly when multiple integrations are in place.
Trigger
Choose the desired sender form from the Form Provider dropdown, such as Contact Form 7, Gravity Form, or Elementor Pro Form, that you wish to link. Once selected, all forms constructed under that provider will be retrieved and automatically displayed in the Form/Task Name dropdown. Proceed to select the form that you intend to integrate.
Action
From the Platform dropdown, opt for Constant Contact. For users of the Pro version of this plugin, an additional choice of Constant Contact [PRO] will be available, offering enhanced functionality such as sending tags and customized fields. Both options have been provided to cater to technical and compatibility requirements. For Pro plugin users, it is recommended to select Constant Contact [PRO], and then proceed to select the Subscribe To List option from the Task dropdown.
Map Fields
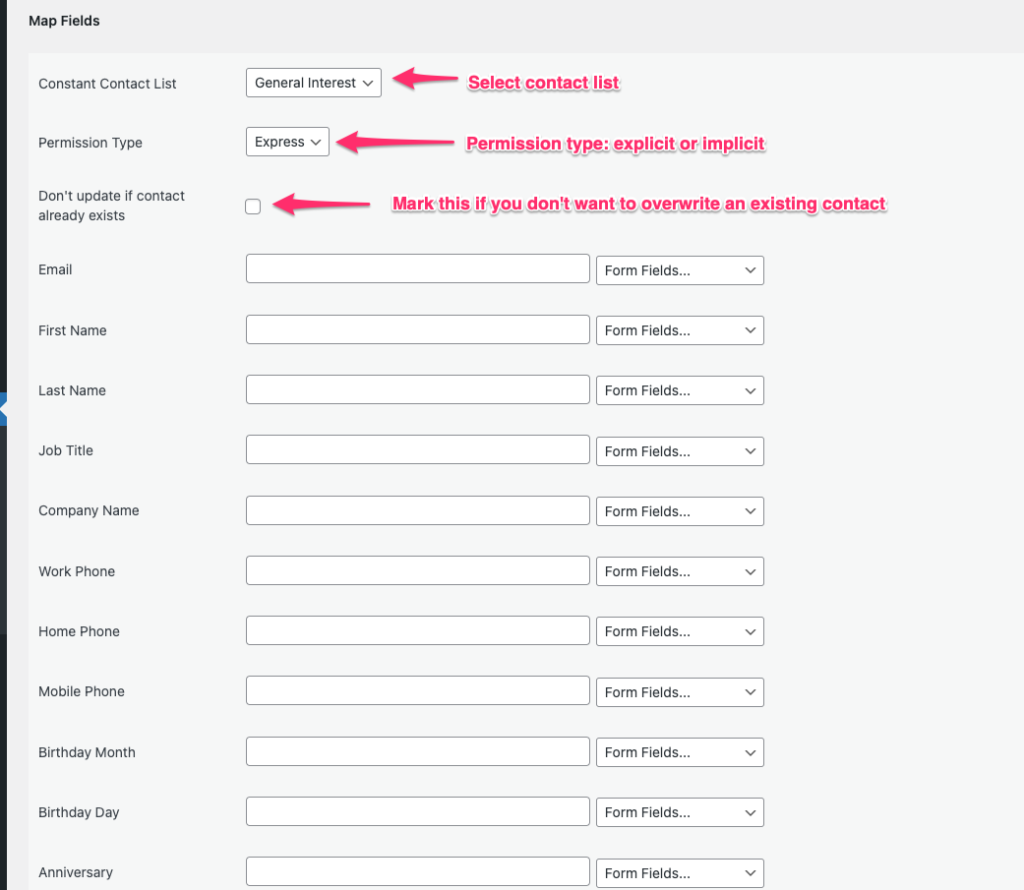
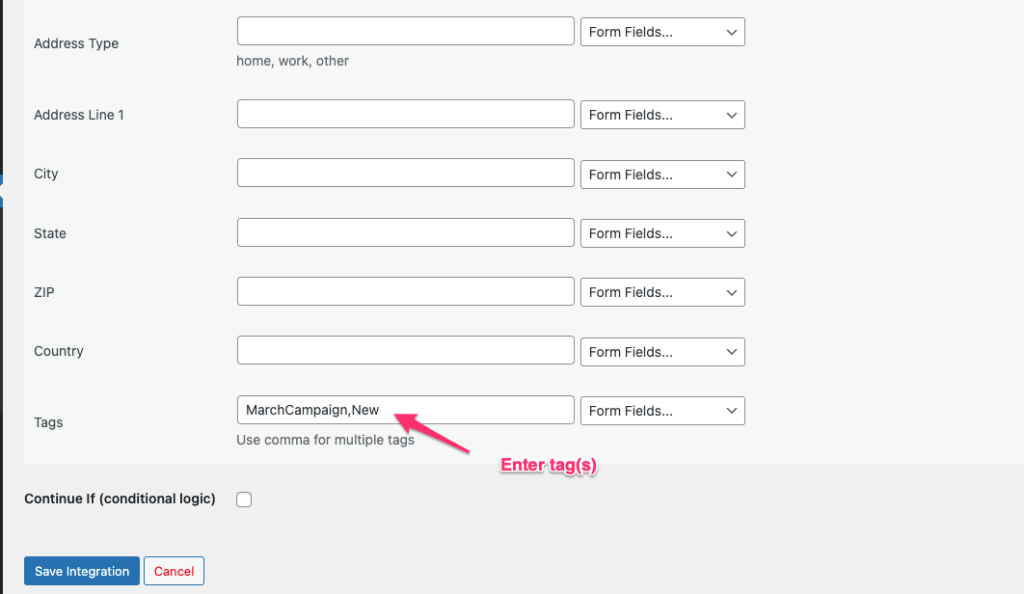
The available Contact List will be automatically populated in the dropdown list. Select the appropriate one. On the left side, you will find Constant Contacts fields, while the form fields dropdown for the selected trigger form will be displayed on the right. Map the necessary fields, such as Email, First Name, Last Name, and any other pertinent fields. Skip any fields that are not required. If utilizing the Pro version, custom fields and an additional field for adding tags will also be visible on the page.
Save Integration
Upon completing the necessary steps, click on the Save Integration button, and you are all set. You can now begin testing.
Troubleshooting
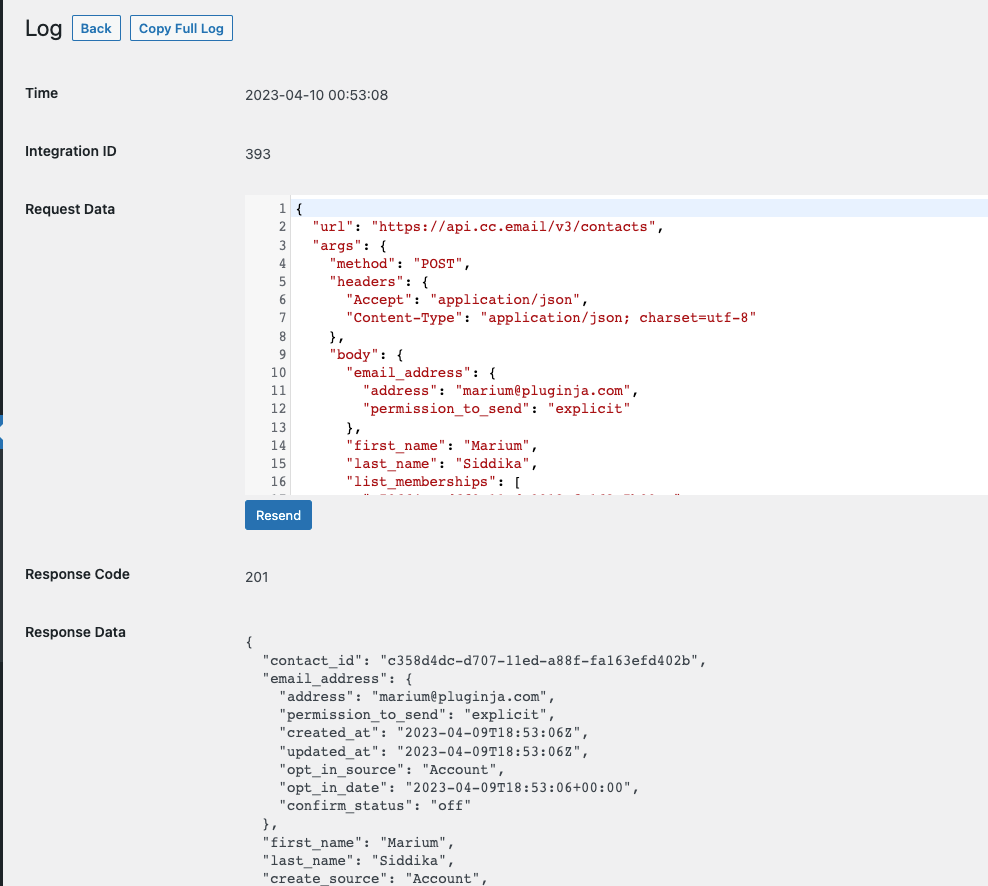
Upon establishing the integration, once users fill out and submit the form, the plugin will trigger the process of transmitting the data to the designated platform. Additionally, a log will be saved, documenting what data was sent and the response received from the platform. If you encounter issues with the integration, the first step would be to review the logs. Navigate to the [direction]AFI > Log[/direction] menu and check the most recent logs. Assess the response data from Constant Contact and attempt to rectify any issues. If the issue persists, attach the log and send an email to su*****@*********************on.com for further assistance.
