Attio CRM
Attio CRM is a powerful, flexible, and data-driven solution that simplifies creating a customized CRM tailored to your business needs. With the AFI plugin, you can integrate many popular WordPress forms with Attio CRM, allowing you to create or update Company People, Deals, and more.
Features
- The basic AFI plugin supports creating Companies, People, and Deals, including custom fields.
- The Pro AFI plugin extends this functionality to all other custom objects and also supports lists.
Authentication
To get started with integrating Attio CRM with the AFI plugin, follow these detailed steps:
Authorize the Attio CRM Account with the AFI Plugin
- Open the AFI plugin menu and navigate to
Settings. - Locate the option for
Attio CRMand toggle it to enable. - Click the
Savebutton to confirm and apply the changes. - A new tab labeled
Attio CRMshould now be visible within the AFI plugin interface.
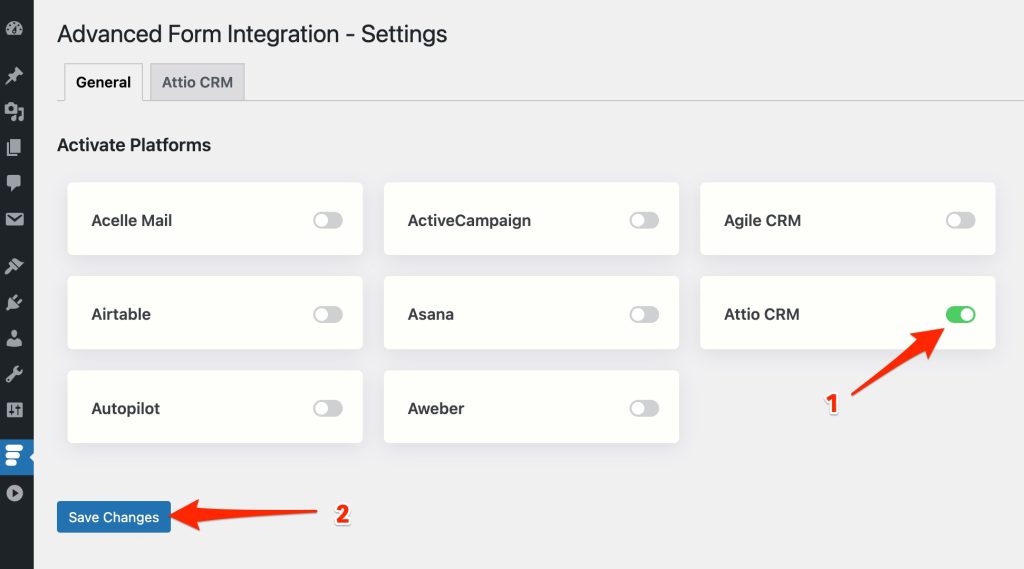
Follow the Instructions in the New Attio CRM Tab
- Click on the newly visible
Attio CRMtab. - Read through the instructions provided to ensure you understand the integration process.
Create Access Token in Attio CRM
- Log in to your Attio CRM account.
- Navigate to the
Settingsmenu. - Select the
Developerssection. - Click on the
Create a new integrationbutton to start the process.
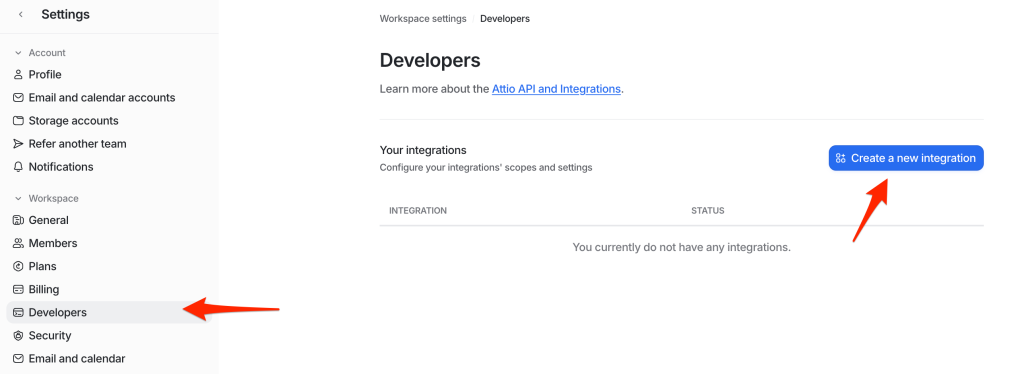
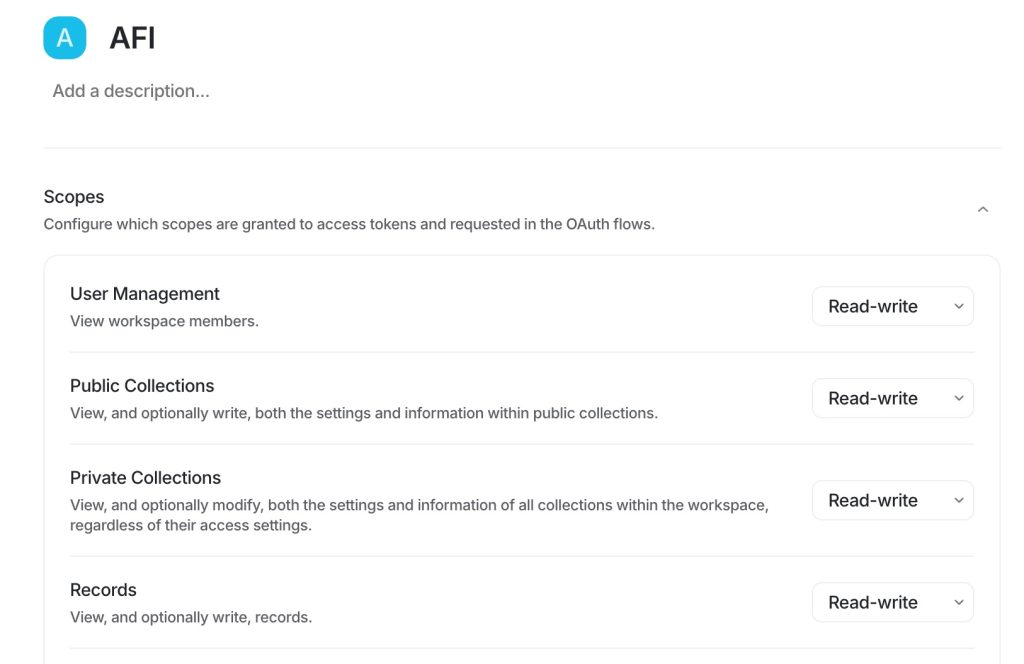
Set scopes
- Enter a suitable title for the integration in the provided field.
- Under
Scopes, select the permissions required for your integration. Depending on your needs, choose eitherreadorread-writeaccess for the necessary entities.
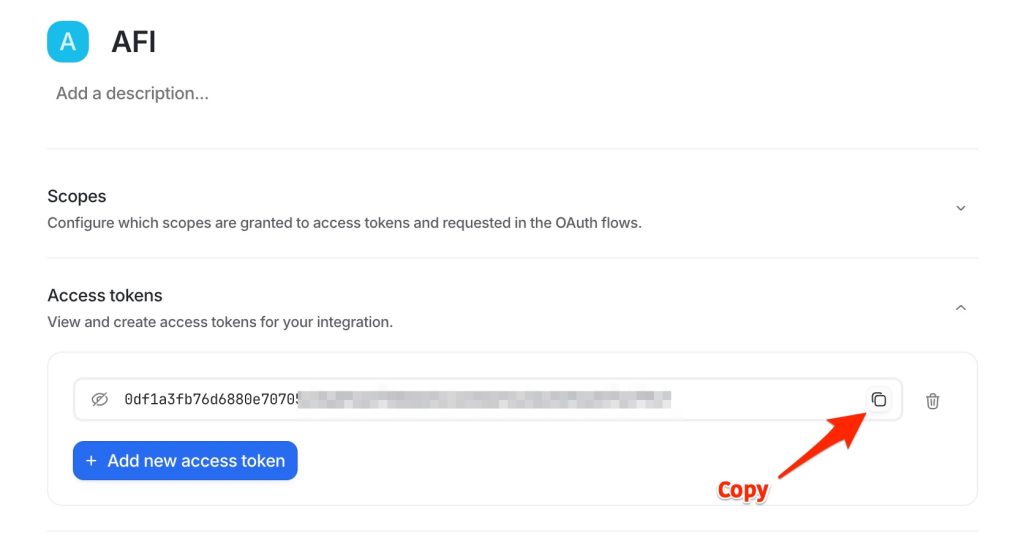
Generate and Copy the Access Token
- After configuring the scopes and saving the integration, an
Access Tokenwill be generated. - Copy this
Access Tokenas you will need it to link Attio CRM with AFI.
Save the Access Token to AFI
- Return to the AFI plugin and go back to the `Attio CRM` tab if you navigated away.
- Paste the copied `Access Token` into the relevant field within AFI.
- Save your changes to complete the authorization process.
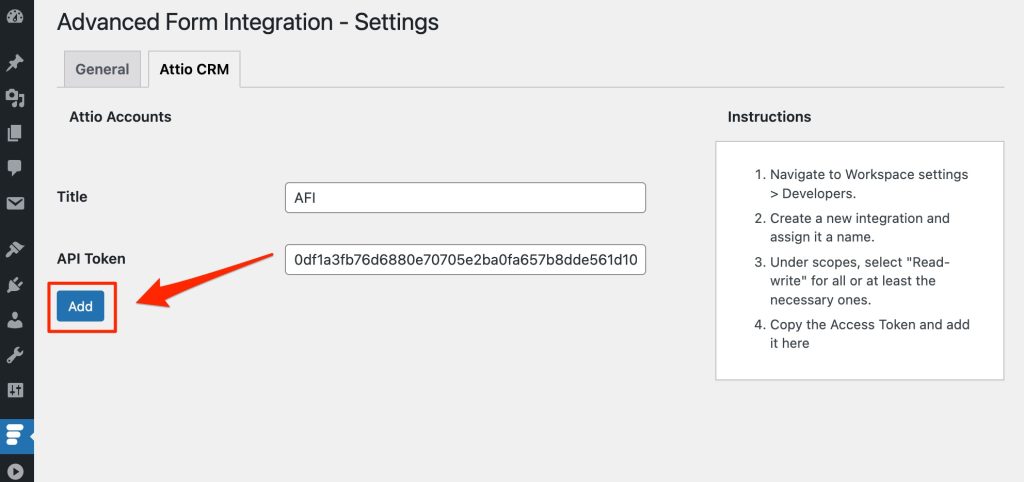
By following the steps outlined above, you will successfully authorize Attio CRM with the AFI plugin. The next task is to create a new integration.
Build Integrations
To create a new integration, follow the steps below:
Select the Platform
- Create a new integration and select the sender platform.
- From the Platform dropdown menu, select Attio CRM.
If you are using the AFI Pro version, choose Attio CRM [PRO]. - Choose the task you want to perform with the integration.
Choose the Authorized Attio Account
- Select the Attio account that you have previously authorized.
- The system will automatically fetch the list of available objects from your Attio CRM account.
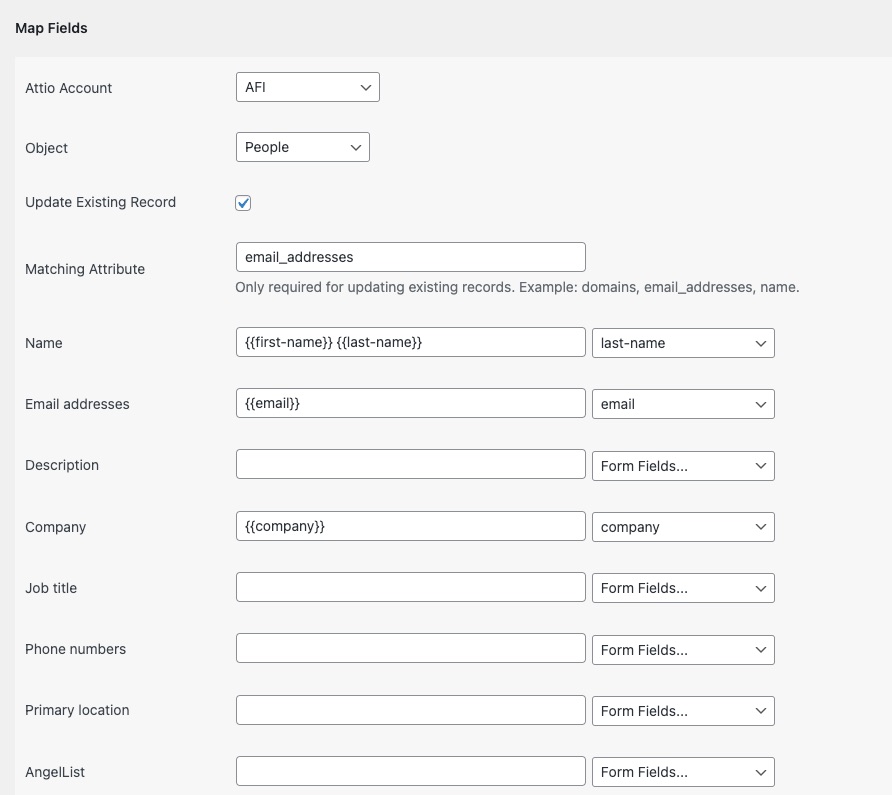
Select the Object and Map Fields
- From the fetched list of objects, select the one you want to work with.
- Map the corresponding sender fields according to your requirements to ensure the data flows correctly between Attio CRM and the AFI plugin.
Updating Objects
Typically, an integration will create new object records within Attio CRM. However, if a record with matching identifiers already exists—such as a company identified by its domain or a person identified by their email address—the system will issue a warning to prevent duplicate entries. If you want to update, check the box to enable this functionality. In the input box provided, enter the attribute name that should be used to identify and update existing records. Common attributes you might use include domains, email_addresses, name, etc.

Company & People Association
Whenever you need to associate a record with an existing company or person, follow these guidelines:
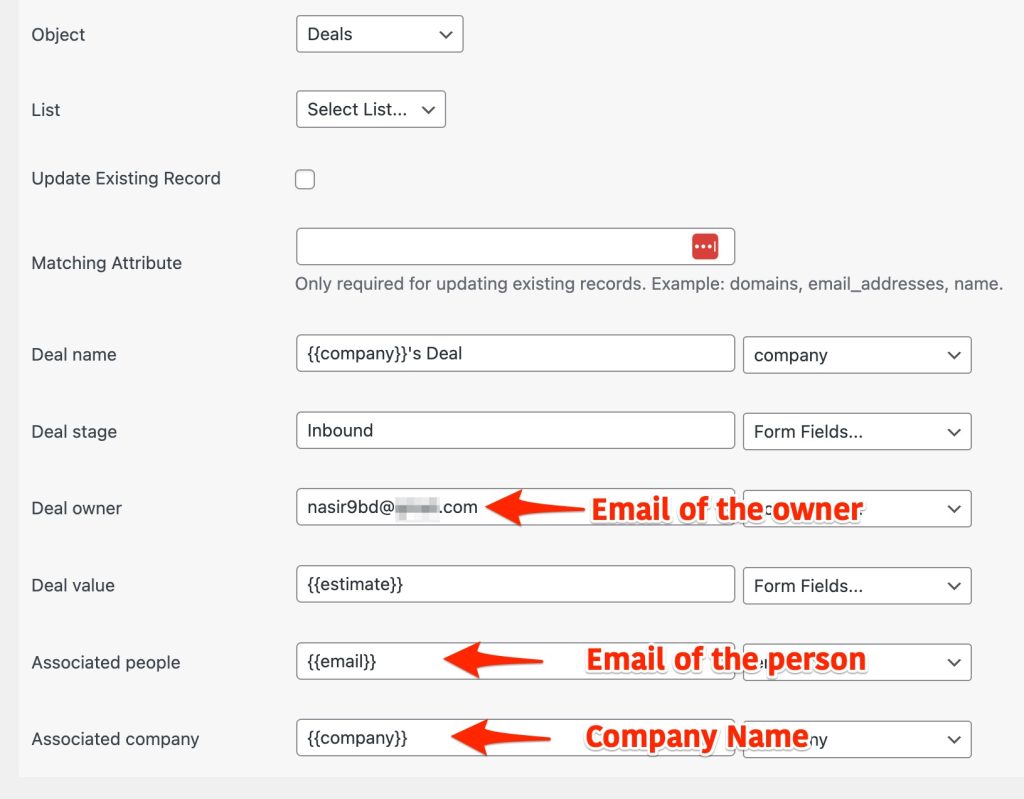
- Creating a Person: To link the new person with an existing company, use the company name.
- Creating a Deal: To associate the deal with an existing company and person, use the company name for the company and the email address for the person.
- Assigning an Owner: Use the email address of the owner to establish the association.
This ensures accurate linking and association of records within your system.
List
You can also add the record to a list, which requires an AFI Pro subscription. To do this, select the desired list from the dropdown menu. The system will then fetch the corresponding list fields. Map these fields accordingly to ensure the appropriate data is sent.

