ActiveCampaign
Overview
The AFI plugin connects your WordPress forms with your ActiveCampaign CRM. When a visitor submits a form, AFI can automatically create or update a contact, assign it to a list, automation, or account, and even create deals and notes.
The Pro version unlocks advanced features such as sending tags, custom fields, and additional deal attributes.
https://youtu.be/jzBIHCTRND0
Supported Features
| Feature | Free | Pro |
|---|---|---|
| Create / Update Contact | ✅ | ✅ |
| Add to Account | ✅ | ✅ |
| Add to List | ✅ | ✅ |
| Add to Automation | ✅ | ✅ |
| Add Note | ✅ | ✅ |
| Create Deal (with basic fields) | ✅ | ✅ |
| Add Tags | ❌ | ✅ |
| Custom Contact Fields | ❌ | ✅ |
| Custom Deal Fields | ❌ | ✅ |
How to Setup
Step 1: Connect Your ActiveCampaign Account
- Go to WordPress Admin > AFI > Settings > General
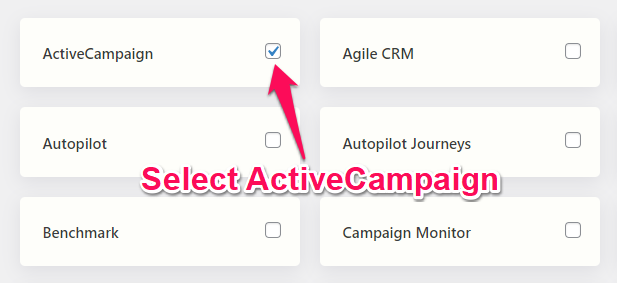
- Enable the ActiveCampaign checkbox and click Save Changes
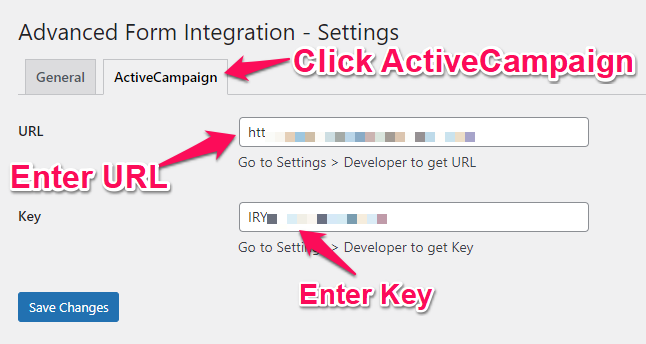
- A new ActiveCampaign tab will appear at the top
- Click the tab and enter your:
- API URL
- API Key
You can find these credentials in your ActiveCampaign dashboard under Settings > Developer
Click Save Changes.


Step 2: Create New Integration
-
Go to AFI > Add New
-
You’ll see the New Integration page
Title
Give your integration a descriptive title so it’s easier to manage.
Trigger
-
Form Provider: Select the form plugin (e.g., Contact Form 7, WPForms, Elementor, etc.)
-
Form/Task Name: Choose the form you want to connect
Step 3: Action Settings
Platform
Select either:
-
ActiveCampaign (Free version)
-
ActiveCampaign [PRO] (Pro version with extended features)
Task
Choose: Add Contact/Deal/Note
This task first creates or updates the contact, then processes lists, automations, accounts, deals, tags, and notes if configured.

Map Fields
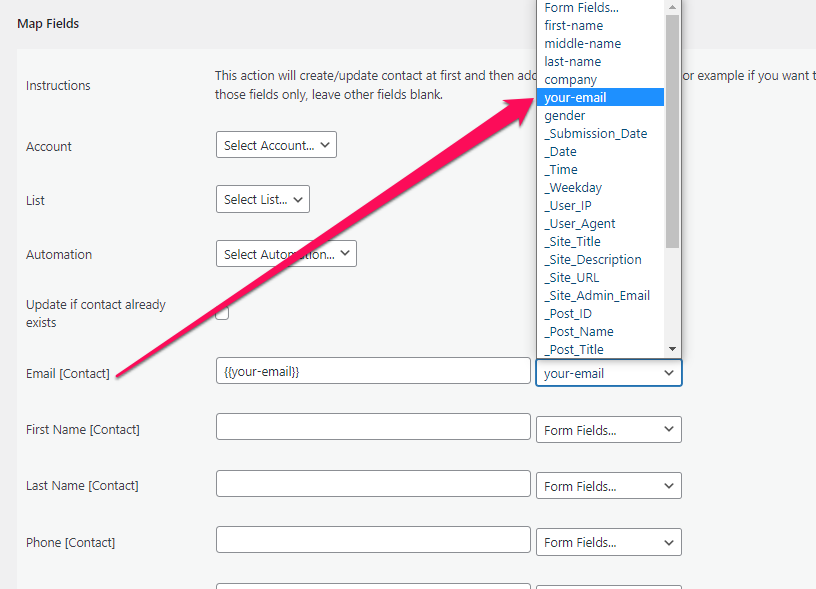
Now you need to select and map the necessary form fields that you want to send to ActiveCampaign.
Account, List and Automation
The dropdown fields for Accounts, Lists, and Automations will be automatically populated with the available options from your connected platform.
These fields are optional. You may select one or more as needed. For example, if you choose an Account or a List while configuring the integration, any new contact created through the form will be automatically added to the selected Account and/or List upon form submission.

Contact
You will see several input fields for the Contact, such as Email, First Name, Last Name, Phone, and more. For each field, use the dropdown on the right to select the corresponding form field from your site.
In the Pro version of the plugin, Tags and Custom Fields will appear below the standard fields.
Fill in the fields you need, and feel free to leave the others blank.
Deal
Below the Contact fields, you will also find fields related to Deals. The Deal Title field is required — if you want to create a deal along with the contact, you must fill in this field.
Complete any other fields as needed, and leave the rest blank.
Note
You can also add a note by filling the Note input field.
Save Integration
Finally, click the Save Integration button and you are done. You can start testing now.
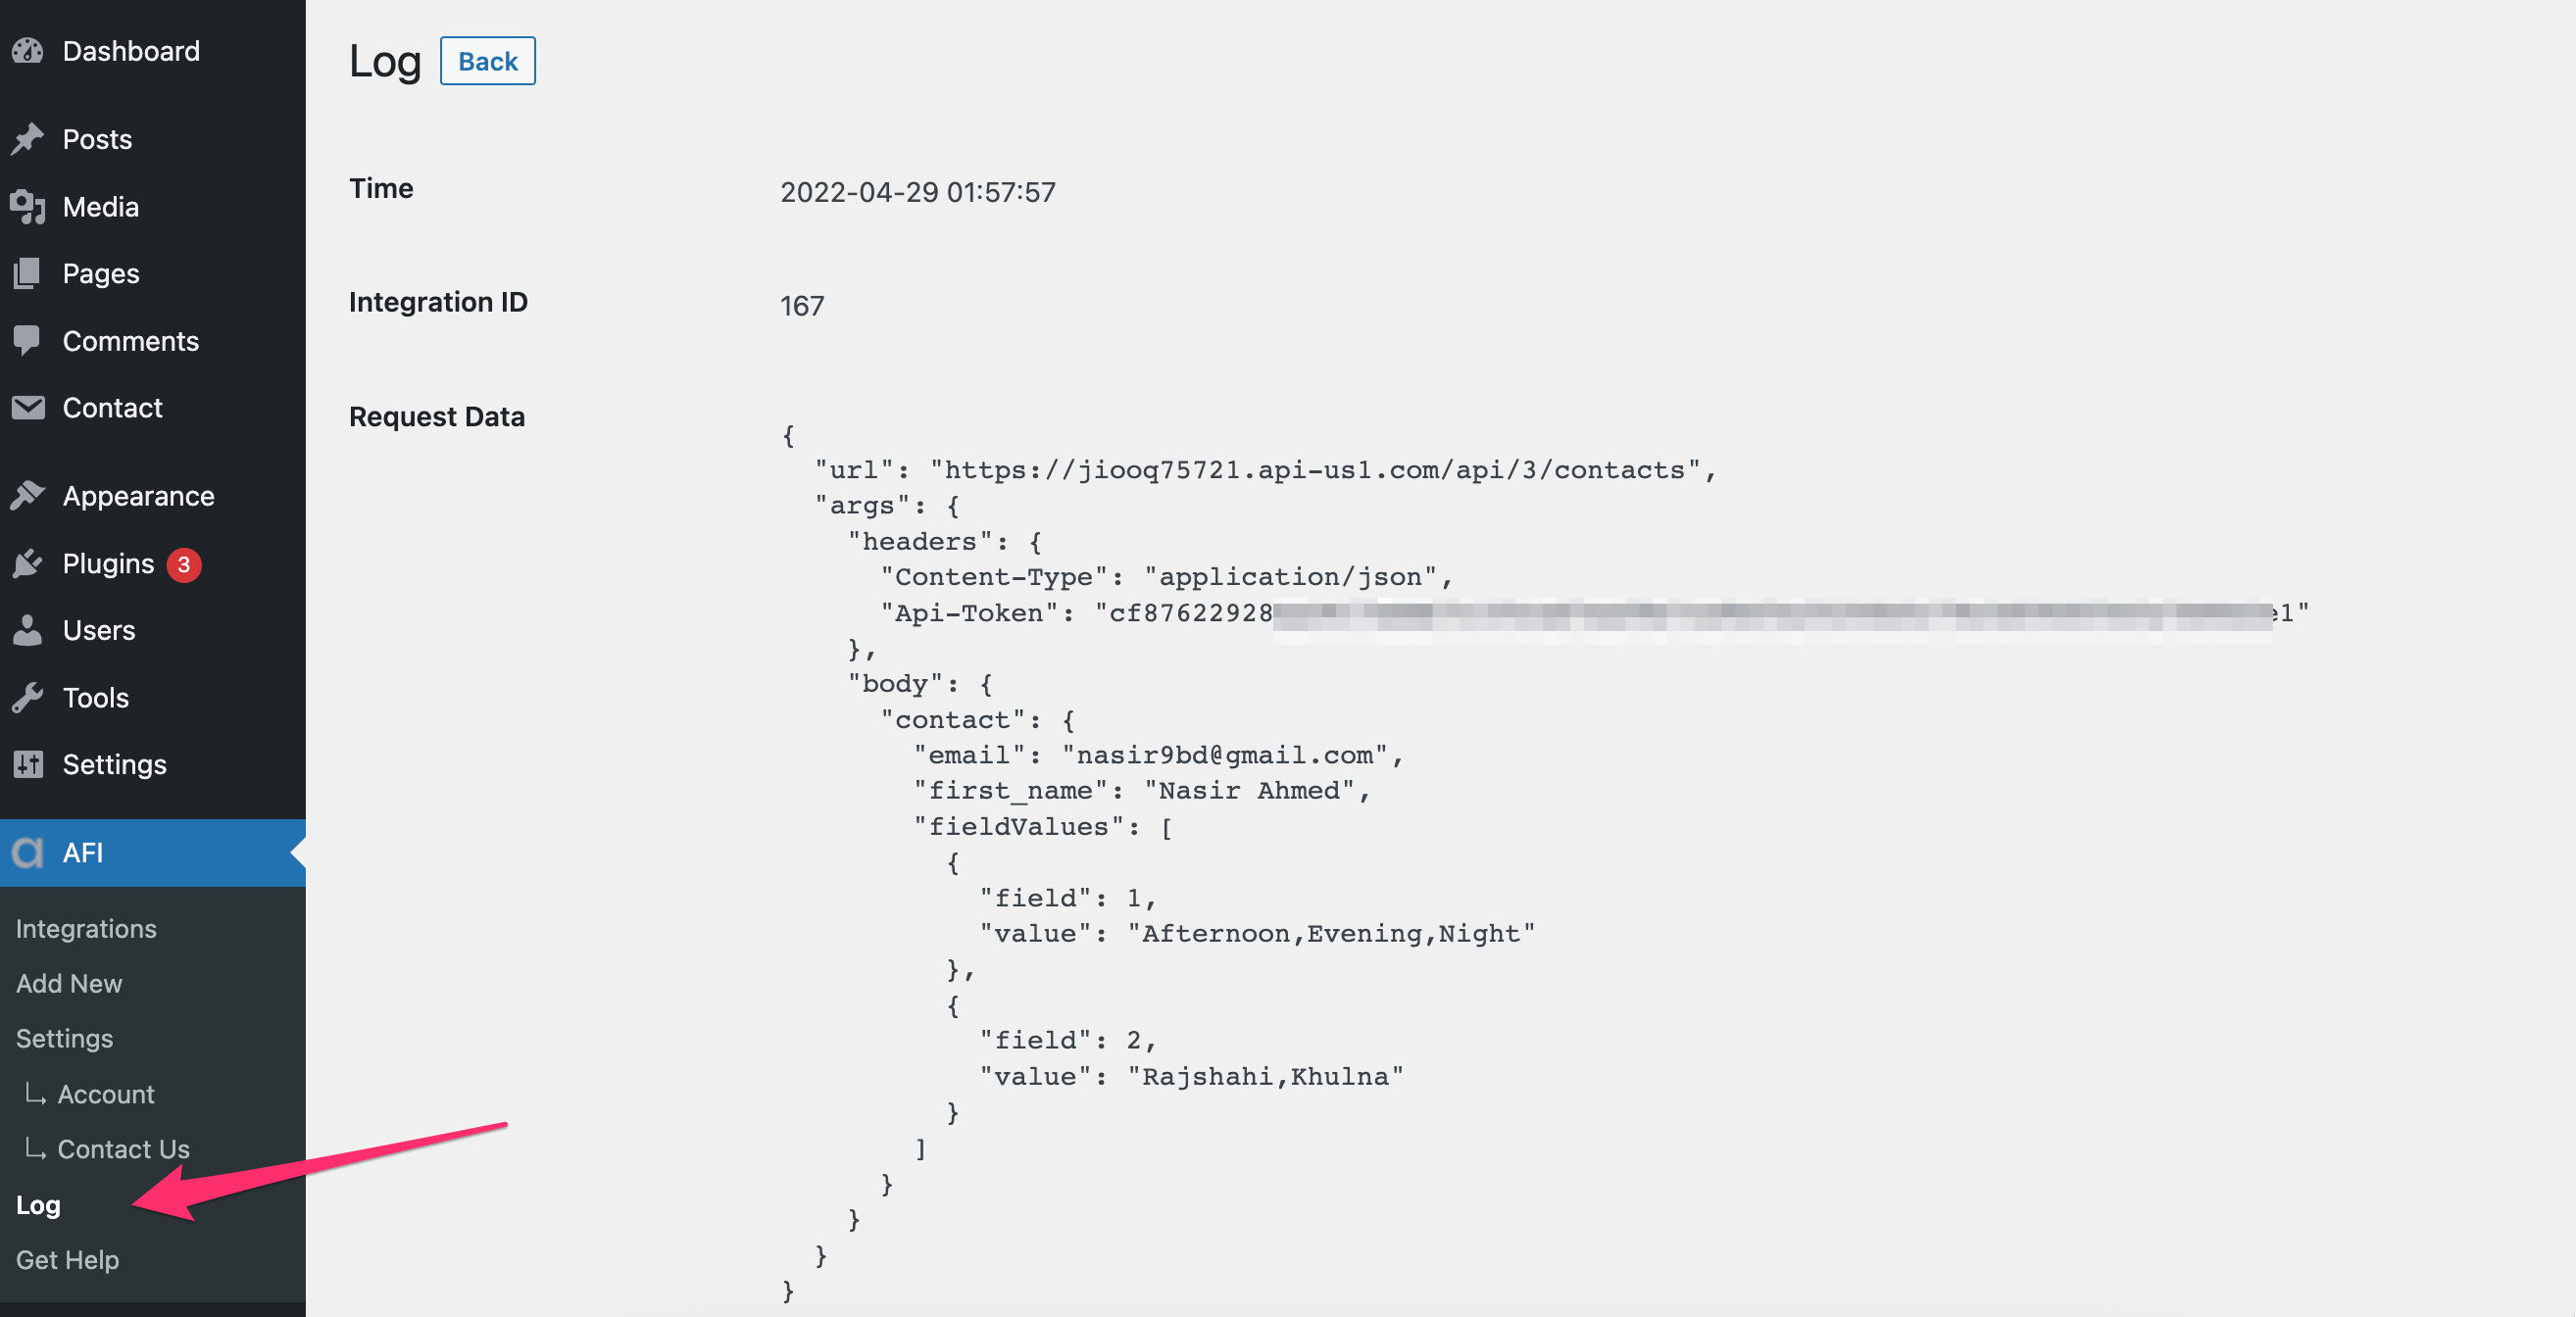
Troubleshooting
After the integration is made, when users fill up the form and submit it, the plugin initiates the process of sending data to the configured platform. It also saves a log that includes what data it tried to send, and what it got in response from that platform. So if you find an integration is not working, your first task is to check the logs. Go to [direction]AFI > Log[/direction] menu and check the recent logs.
