Overview
By utilizing the Advanced Form Integration (AFI) plugin, you can effortlessly connect Elementor Pro Forms with Asana. As soon as a user completes a form on your website, the plugin will automatically forward the data to your Asana account and initiate a new task. Moreover, the AFI Pro version facilitates the inclusion of custom fields as well.
Supported Features
- Initiate a new task. Custom fields are also supported.
Requirements
- The feature requires a Pro license. BUY NOW!
- Make sure that the Pro version of the Advanced Form Integration plugin is installed and activated. You should have got the links in the email after purchase. You can also download it anytime by logging into the user dashboard.
- Read plugin documentation for Elementor Pro Forms and Asana. It is not required but helpful for a better understanding.
Set up Asana API Connection
Before starting, you are required to set up the Asana API connection in plugin settings.
- Go to the WordPress admin area, and click AFI > Settings.
- Turn on the Asana and click Save. Open the Asana tab.
- Go to your Asana Developer Console and create a new access token.
- Paste the token in the Personal Access Token input box and click Save Changes.
Create New Integration
Once the API connection is done you can start creating new integration. Click on Add New under the AFI menu, New Integration page will appear.
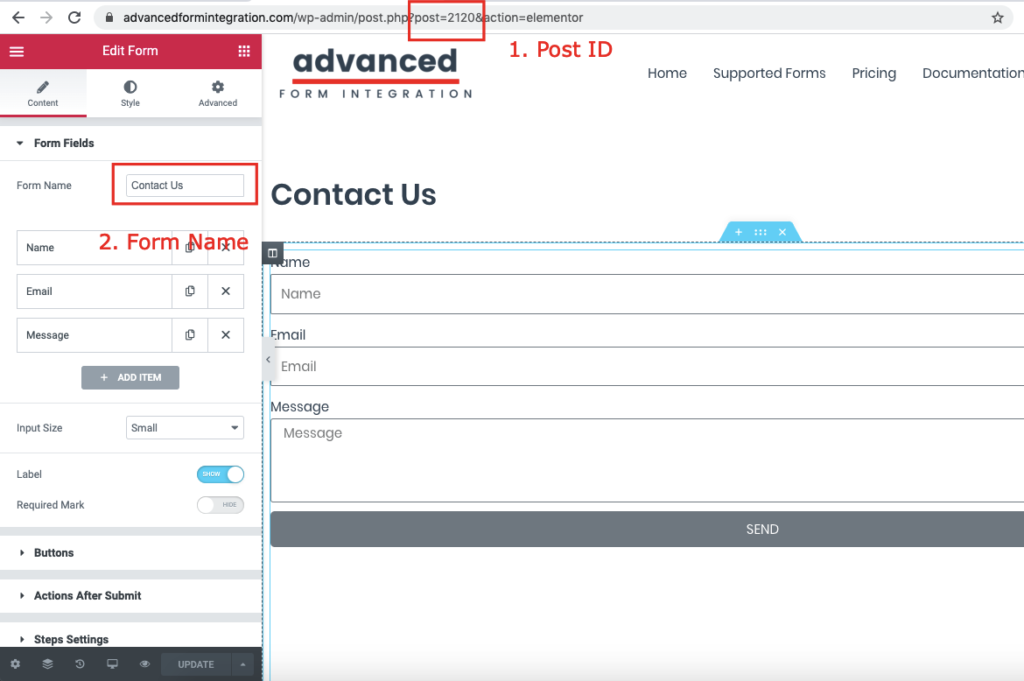
Title
A default title will be auto-generated with an auto incremental number. You can rename it to something related to the task. It will help you to quickly recognize the correct one when there is multiple integrations setup.
Trigger
Select Elementor Pro Forms in the Form Provider dropdown. The Elementor Pro Forms plugin must be installed and activated otherwise you won’t see it list

Action
Select Asana [PRO] in the Platform dropdown.
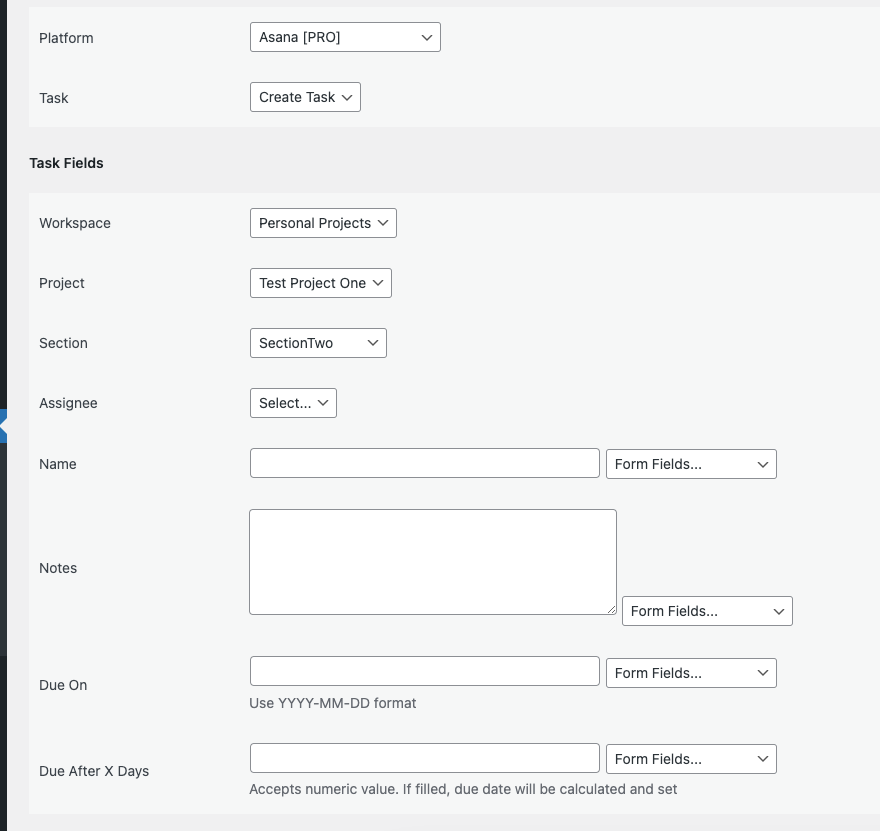
Map Fields
The Map Fields section will appear where you’ll be able to choose which fields to send. Select Workspace and Project where you want to initiate the task. Select the task name and description. You can also set a due date Finally, click the Save Integration button.
Conditional Logic
Please check the documentation on Conditional Logic.
Frequently asked questions
Troubleshooting
Still, need help?
Reach our support team at su*****@*********************on.com